
Captain's Brief · Sea Tools / Passage Planning · 24 min read · Oct 9, 2026
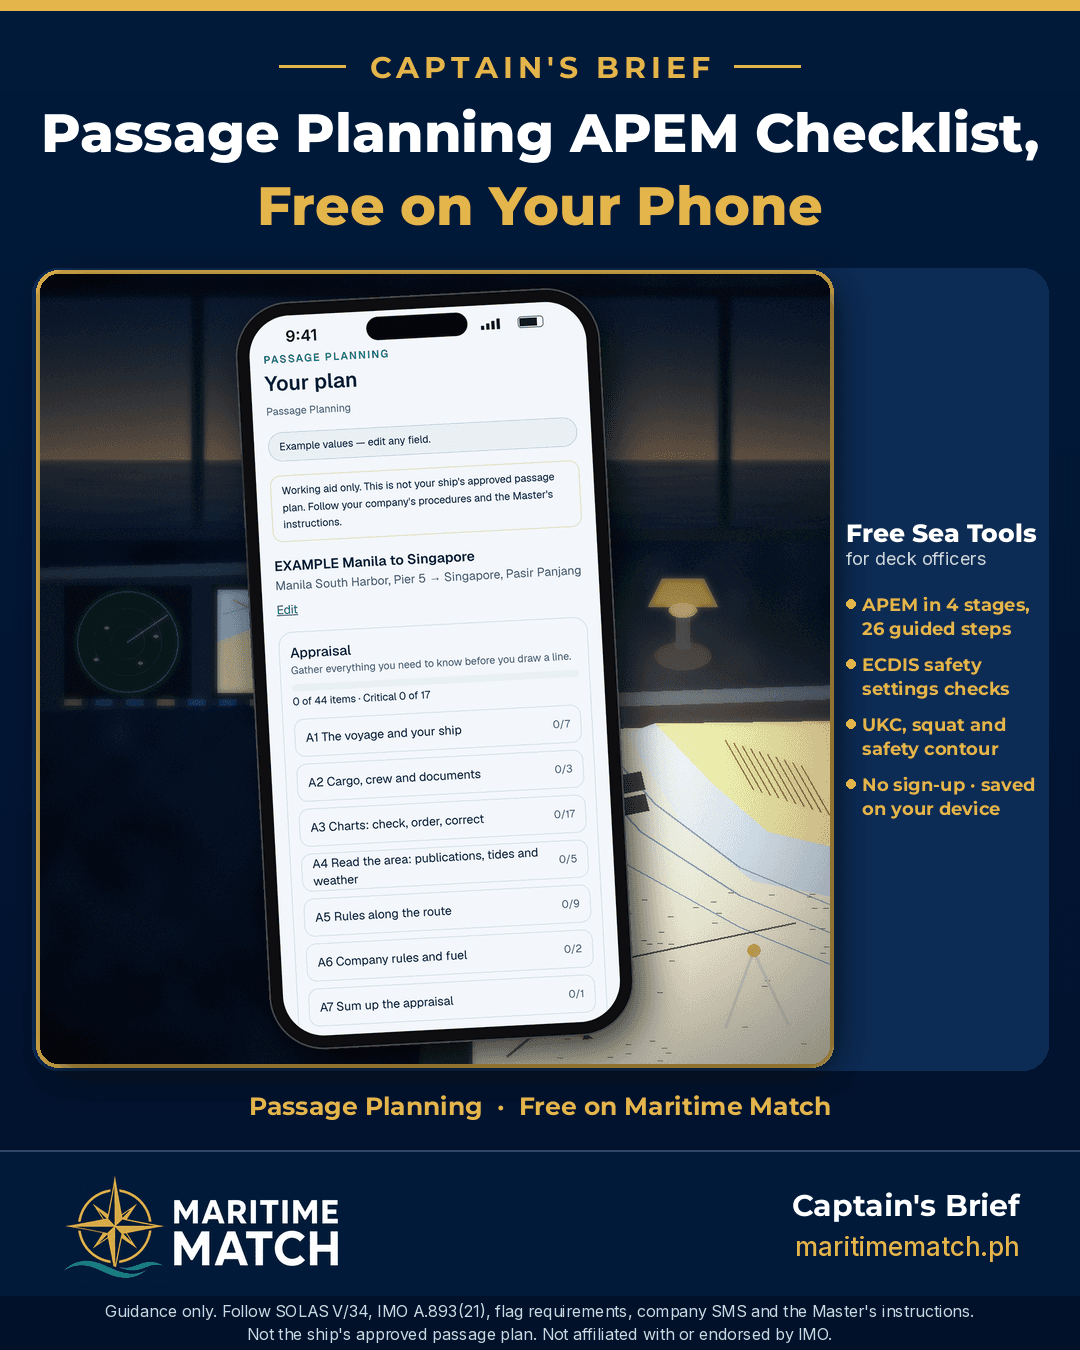
Free Passage Planning APEM Checklist: Plan Berth to Berth and Understand Your ECDIS Safety Settings
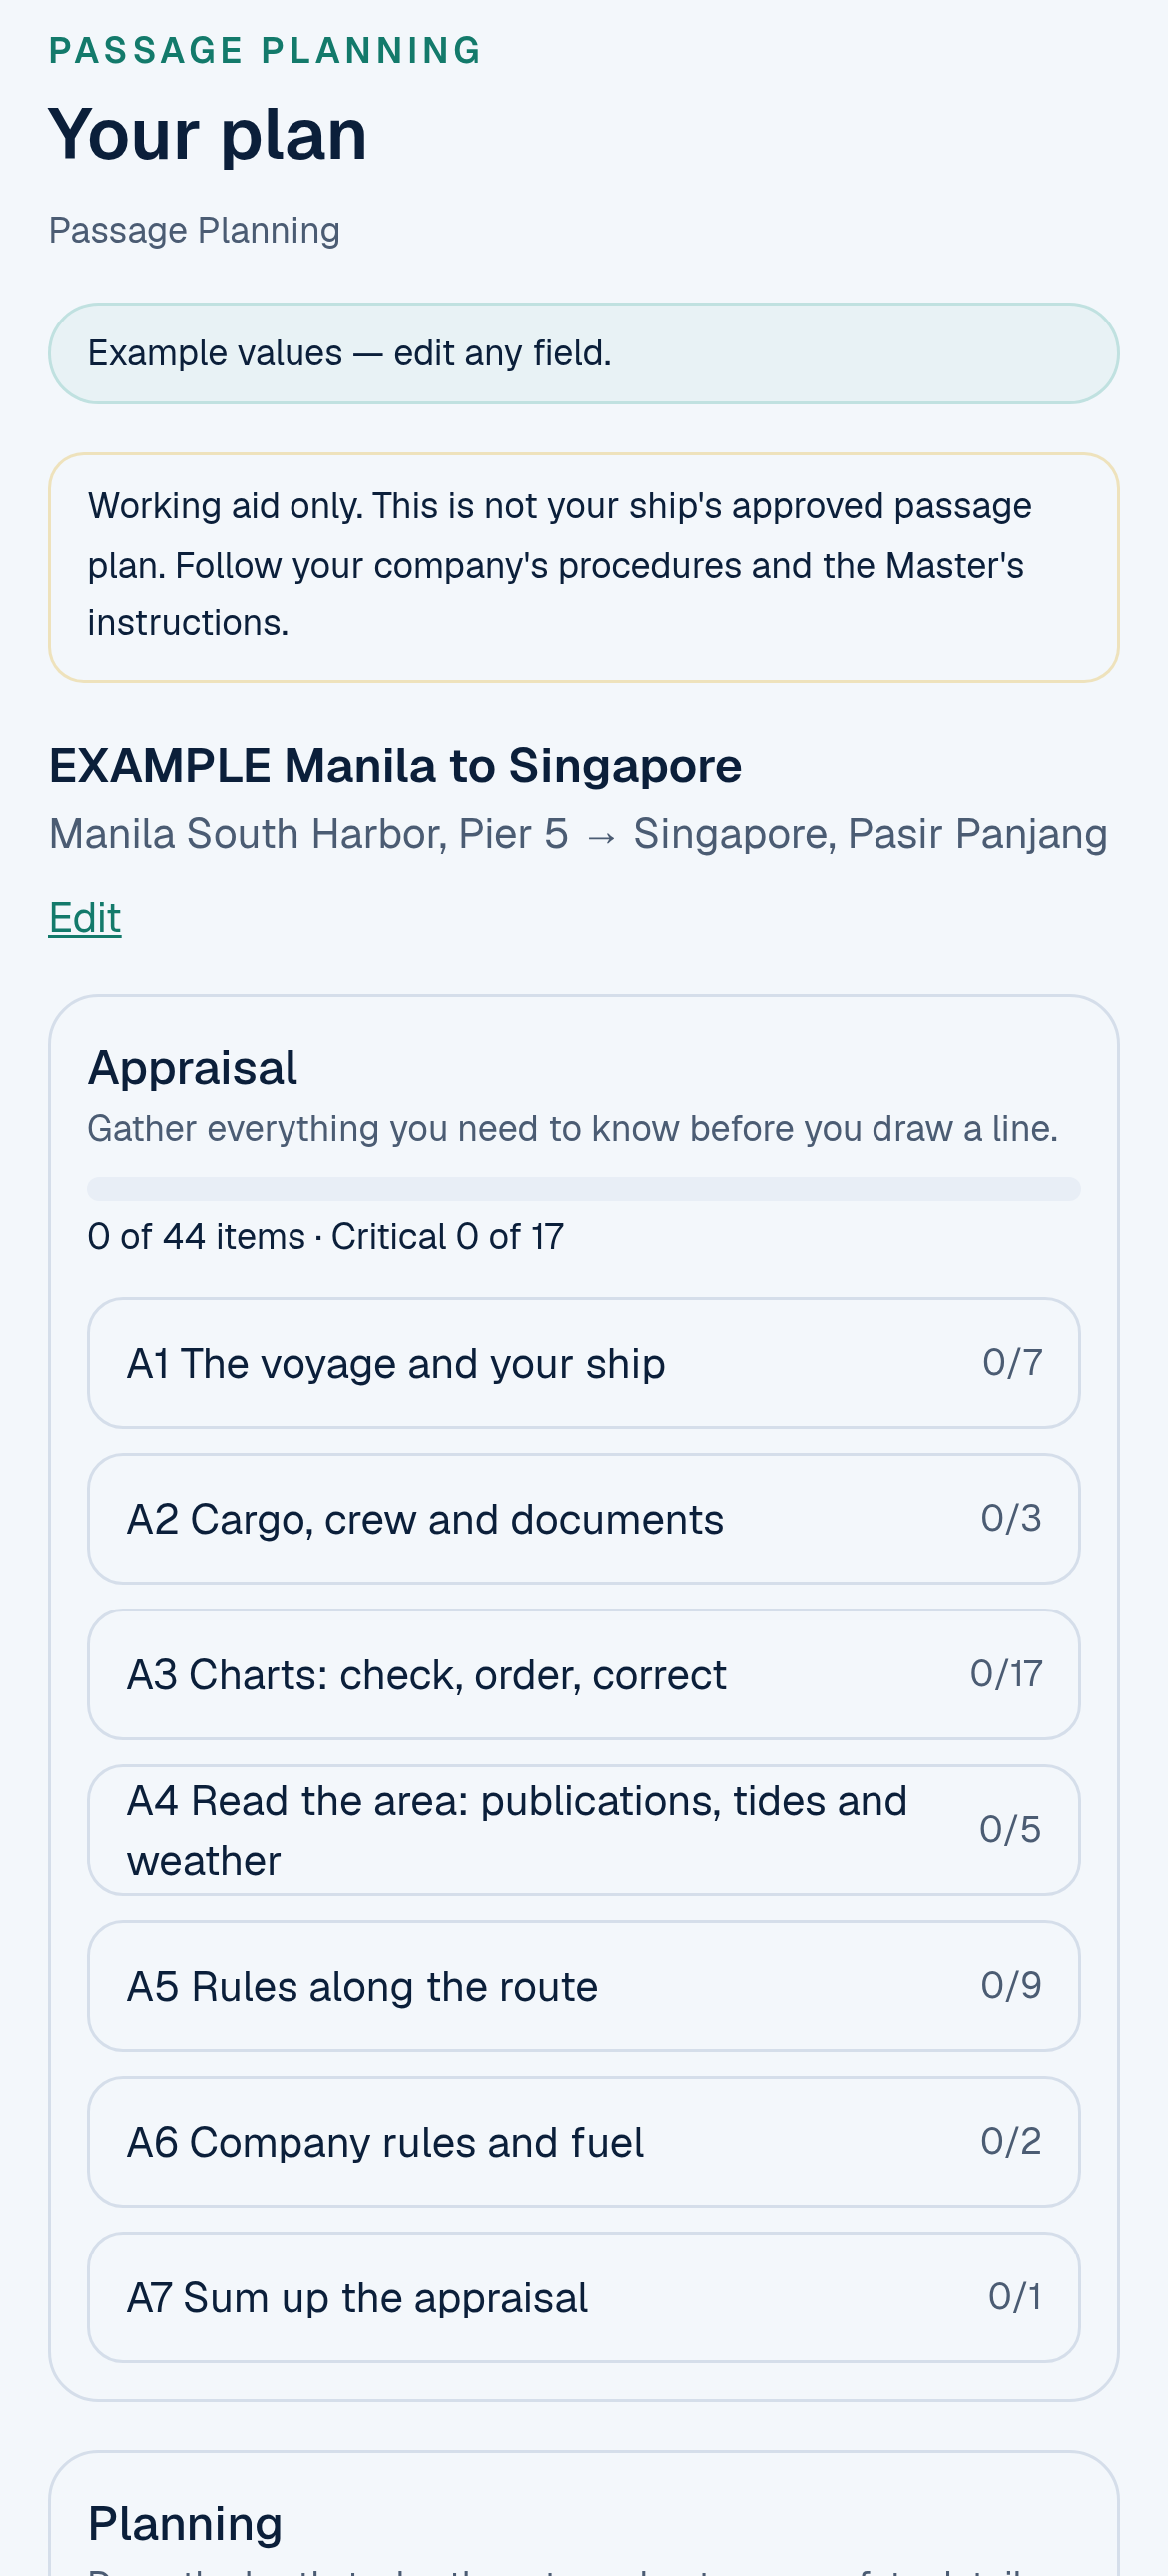
Your plan, in four stages: Appraisal, Planning, Execution and Monitoring. These are example values.
Most navigation officers know the routine of passage planning: lay the track, fill in the company form, ask the Master to sign. That routine matters, but it's only the part you can see. Behind it is a way of thinking that IMO calls APEM: Appraisal, Planning, Execution and Monitoring. It's the thinking that tells you why the safety contour should be a certain depth, why a leg needs a parallel index line, and what an ECDIS alarm is really warning you about.
Maritime Match now has a free Passage Planning tool in Sea Tools. It's a guided APEM checklist that takes you through the whole plan, berth to berth, one step at a time, and explains the reason behind every item.
Quick answer: The Passage Planning tool is free at maritimematch.ph/sea-tools/passage-planning, with no sign-up.
It's an APEM checklist: 4 stages and 26 guided steps, from the first appraisal to monitoring the passage. Every item has a Why? that tells you the reason and where the rule comes from. The aim isn't just to tick boxes. It's to learn the full thinking behind the routine.
It guides you through the ECDIS safety settings (safety depth, safety contour, shallow and deep contours, cross-track limits, look-ahead, alarms and the route check) and ties the plan to your radar parallel index, echo sounder, GNSS and AIS checks. It includes calculators for UKC and squat, safety contour, wheel-over, tidal window, air draft and ECA fuel changeover, a paper chart step and a publication checklist (titles and volume numbers only).
Your plan is saved on your device only. It's a working aid, not the ship's approved passage plan. Follow SOLAS V/34, IMO Resolution A.893(21), your flag's requirements, your company SMS and the Master's instructions.
Why I built the Passage Planning tool
Passage planning is often passed on as a routine: copy the last voyage's plan, change the dates, tick the form. That leaves real gaps, because a proper plan is Appraisal, Planning, Execution and Monitoring, and each stage asks you to think, not just fill in. I built this free APEM checklist so that every navigation officer can learn the whole method step by step, and in the end plan a route on their own, set the ECDIS safety settings and alarms for their ship, and understand what the ECDIS and the rest of the bridge equipment are telling them.
Key terms, explained simply
Here are the words you'll meet in the tool, explained the way you'd explain them to a new deck cadet.
APEM. The four stages of voyage planning in IMO Resolution A.893(21), Guidelines for Voyage Planning (1999):
- Appraisal: gathering everything you need to know about the voyage before you draw a line: the ship, the cargo, the charts, the publications, tides, weather and the rules along the route.
- Planning: using what you gathered to draw the complete route and mark every safety detail on it.
- Execution: carrying out the plan, taking account of the real conditions on the day.
- Monitoring: checking the ship's progress against the plan, all the time, and acting when it drifts.
SOLAS Chapter V, Regulation 34 says that before a voyage the Master makes sure the intended passage is planned using the right charts and publications, in line with IMO's guidelines.
Berth to berth. The plan covers the whole voyage, from the berth you leave to the berth you arrive at, including pilotage waters and anchorages. It isn't just the open-sea part between pilot stations.
UKC (under keel clearance). The vertical space between the lowest point of the hull and the seabed. Your company sets a minimum UKC in the SMS, often as metres or a percentage of the draught.
Squat. The extra sinkage of a moving ship in shallow water. It grows quickly with speed: double the speed and squat is roughly four times bigger. It's worse in narrow channels.
CATZOC. The category of zone of confidence shown in an ENC. It tells you how good the survey data is (A1, A2, B, C, D, U). The lower the category, the more margin you add for depth and position errors.
Safety depth. The depth you set in ECDIS that tells it which spot soundings are dangerous for your ship. Soundings shallower than this value are shown more boldly.
Safety contour. The depth contour you set in ECDIS that divides safe water from unsafe water for your ship. ECDIS draws it more boldly and uses it for the route check and anti-grounding alarms. If the value you enter isn't one of the contours in the ENC, ECDIS uses the next deeper contour available. That's why the contour shown can be deeper than the value you calculated.
Shallow and deep contours. Two extra contours that shade the water into depth bands on the ECDIS display. The shallow contour should never be less than your draught. The values follow your company's ECDIS policy.
No-go area. Water where your ship must not go on this voyage at this draught, because it's too shallow or otherwise dangerous. You mark no-go areas clearly on the chart or in ECDIS.
Route check. The automatic check ECDIS runs on a planned route. It looks for crossings of the safety contour, dangers, restricted areas and other hazards inside the cross-track corridor. Every alarm or indication it raises must be fixed or explained.
Alarms and indications. ECDIS warnings. An alarm demands attention (for example, crossing the safety contour). An indication gives information (for example, entering an area you asked to be told about, such as a TSS or a PSSA).
Look-ahead (guard zone, anti-grounding check). The area or time ahead of the ship that ECDIS keeps watching for the safety contour and dangers while the ship is moving. Set it to suit the speed and the sea room.
Cross-track limit (XTD or XTL). The width of the safe corridor either side of each leg. If the ship goes outside it, ECDIS raises an alarm. A good plan sets it leg by leg, not one figure for the whole voyage.
Wheel-over point. The point on the old track where you start the turn (put the helm over) so that the ship settles on the new track. It's worked out from the ship's turning data at the planned speed.
Parallel index (PI). A line drawn on the radar parallel to your track, at a set distance from a fixed, radar-conspicuous object. If the object's echo stays on the line, you are on track. It's an independent check that doesn't depend on GNSS.
Clearing bearing (and clearing range). A bearing or a distance from a charted object that marks the edge of safe water. "Not more than 045°" or "not less than 2 miles" keeps you clear of the danger.
Abort point. The last point where you can still safely give up a manoeuvre, such as entering a narrow channel or approaching a berth. After it you are committed, so the plan says what to do if you abort.
Contingency anchorage. A pre-planned place to anchor, or an area of safe deep water, in case something goes wrong, for example an engine failure, bad weather or a port delay.
NtM and T&P. Notices to Mariners (NtM) are the regular corrections to charts and publications. T&P notices are temporary and preliminary notices: changes that are short-term or not yet confirmed. On paper charts they are plotted in pencil and removed when cancelled.
How to use the Passage Planning tool, step by step
Open maritimematch.ph/sea-tools and tap Passage Planning. The first time, you'll see the disclaimer. Read it and tap I understand.
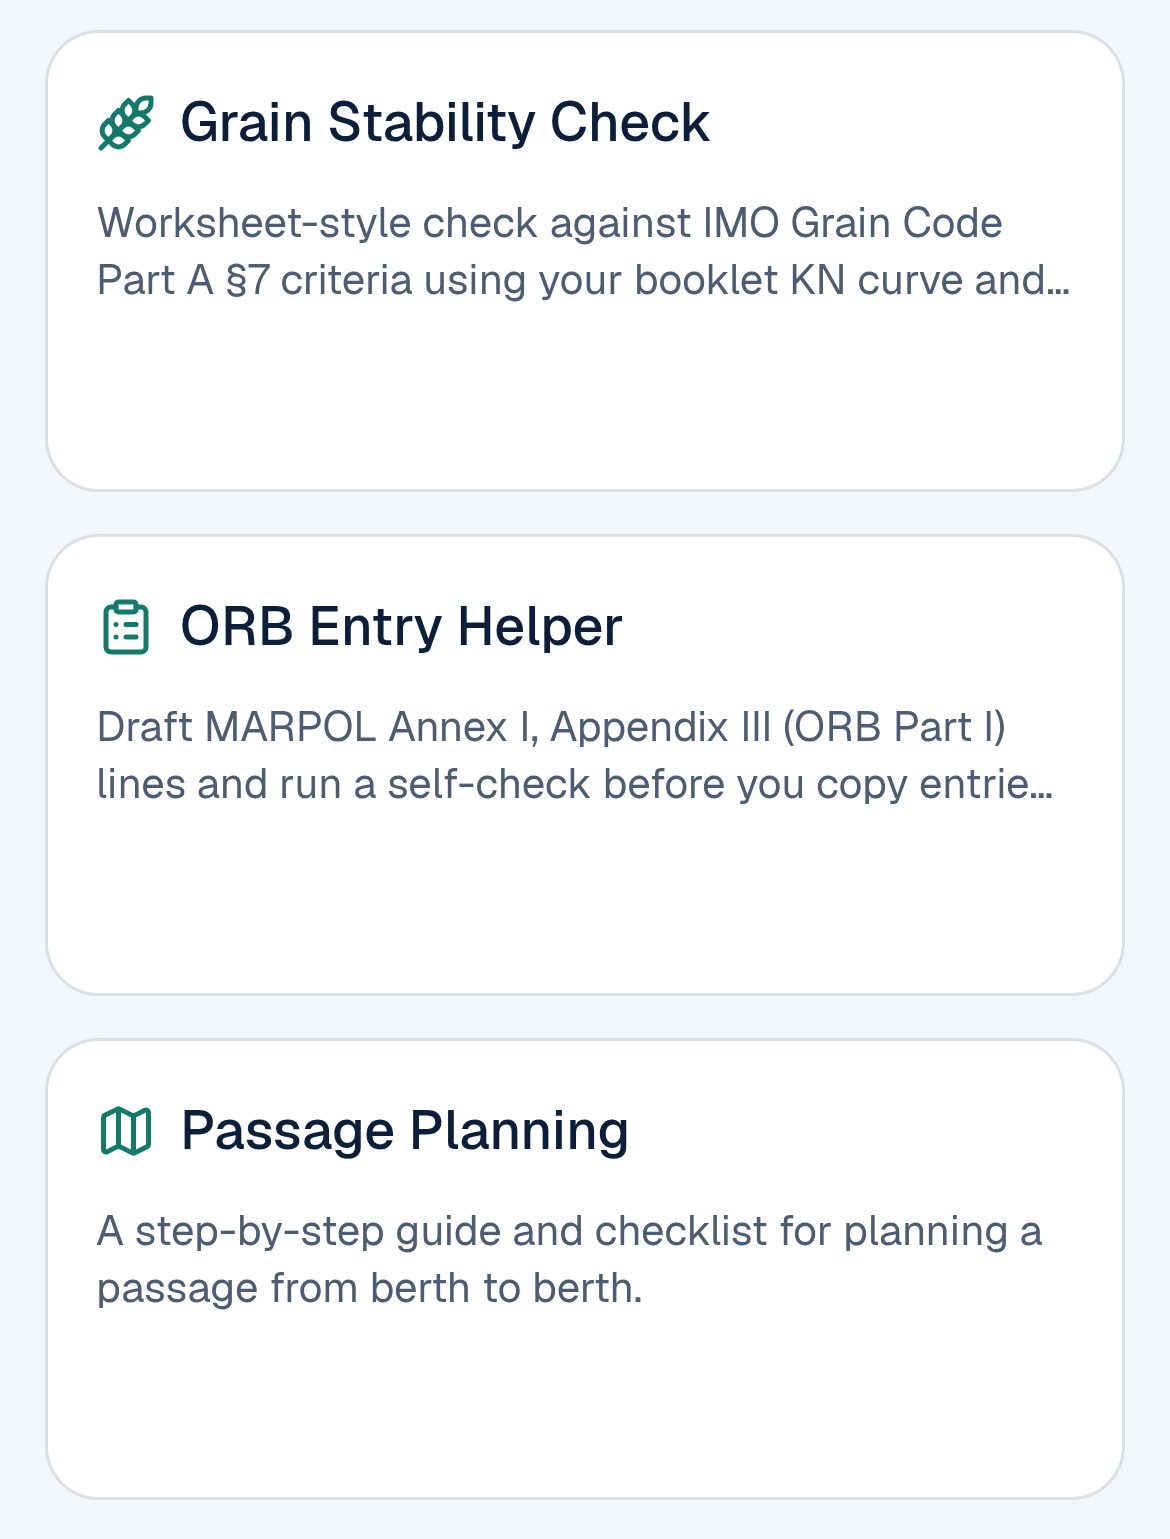
Passage Planning is the seventh tile on the Sea Tools page, after Grain Stability Check and ORB Entry Helper.
The home screen has four buttons: Start a new plan, Calculators, Key terms and My plans.
1. Set up the voyage
Tap Start a new plan and fill in Voyage setup:
- the plan name, the departure and arrival port and berth, ETD and ETA;
- the maximum draught on departure and arrival, air draft, beam and block coefficient (Cb);
- your company minimum UKC from the SMS, in metres or as a % of draught. Leave it blank until you have your company's figure.
Then set the four switches: Pilotage on this voyage, ECA on the route, Heavy weather expected and Paper charts used. The switches decide which steps you'll see. For example, the steps for entering and leaving an ECA and for heavy weather only appear when you switch those on. Paper charts used is on by default. Turn it off only if the ship carries no paper charts at all.
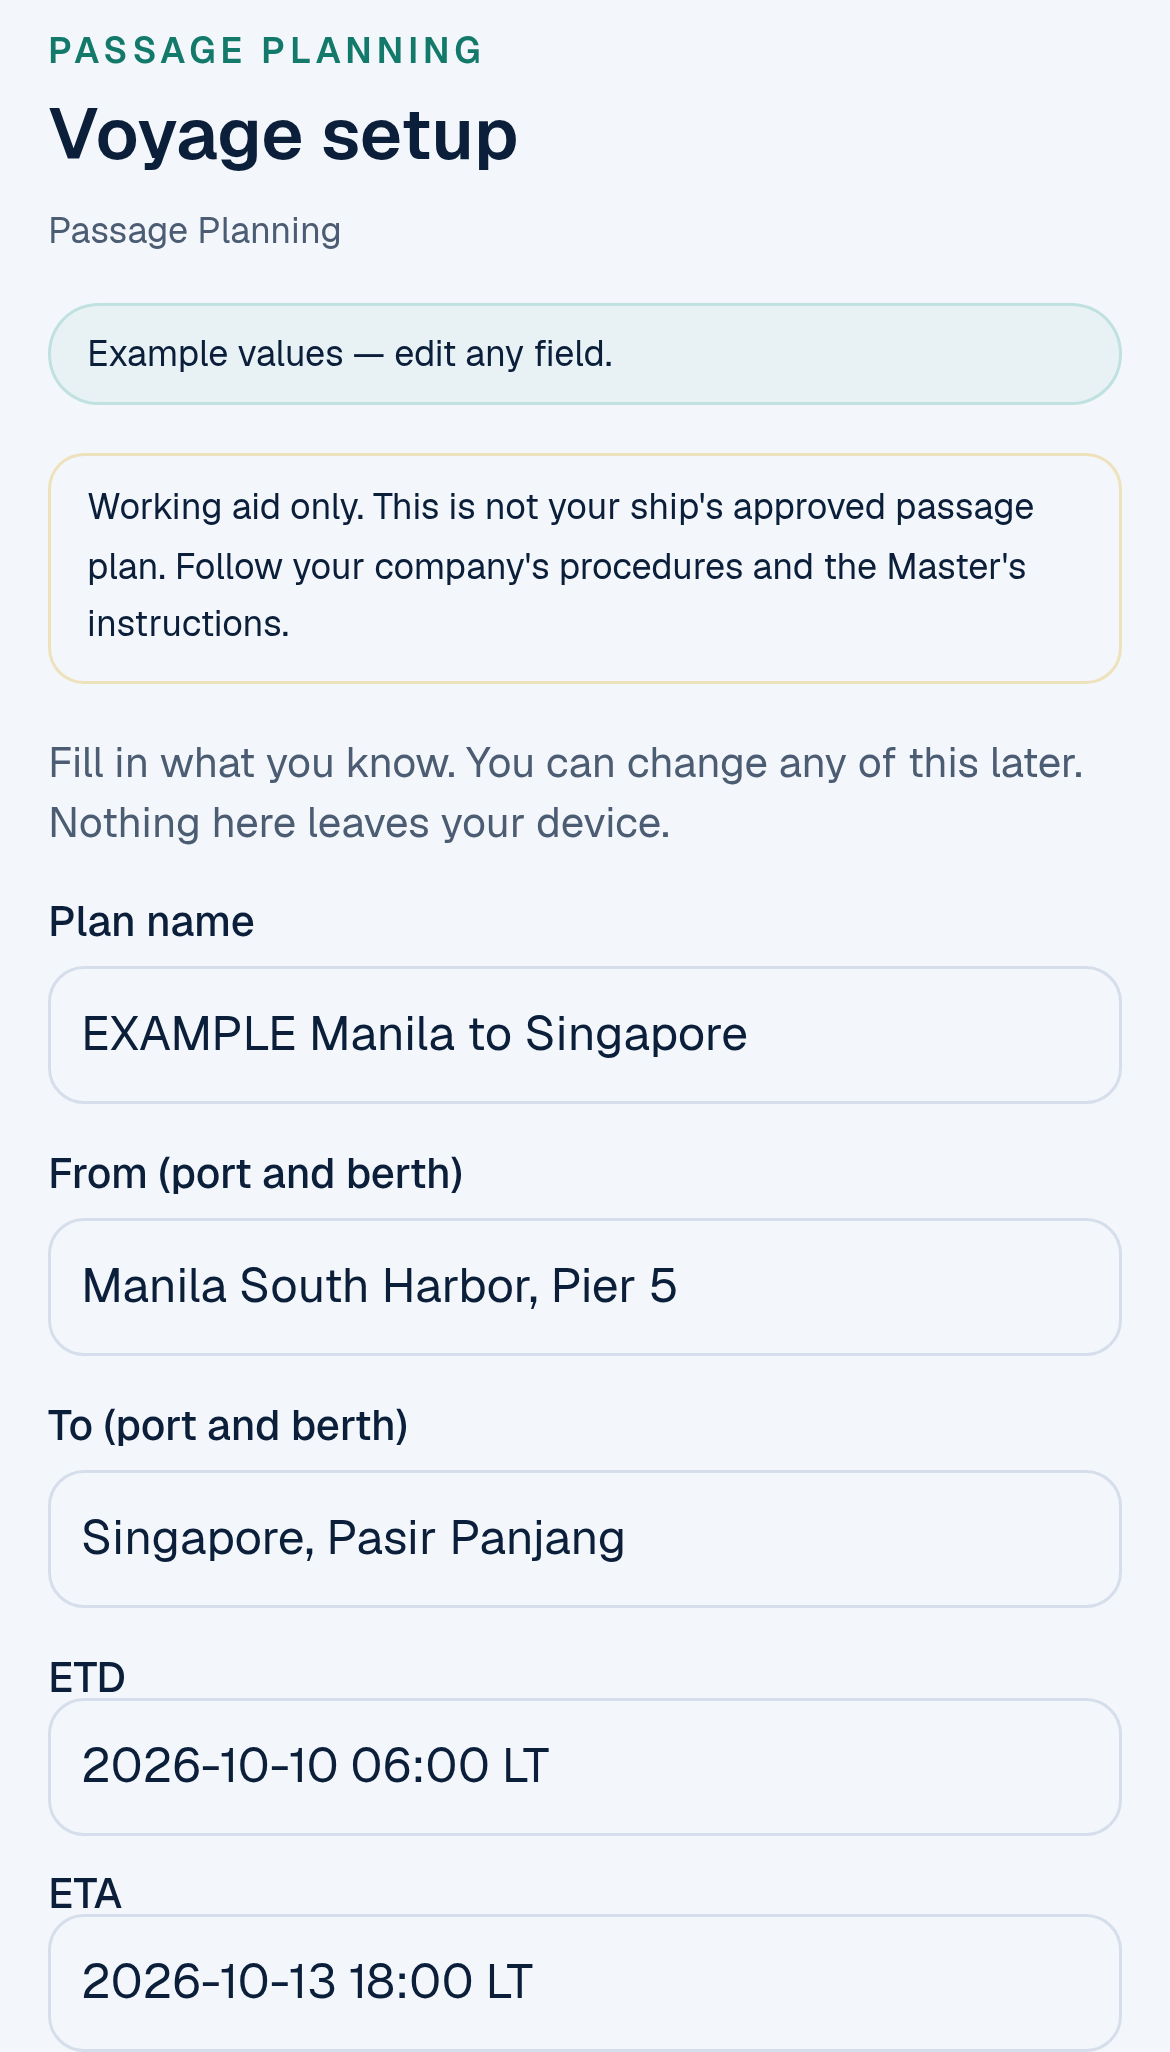
Voyage setup, part 1: where and when (example values).
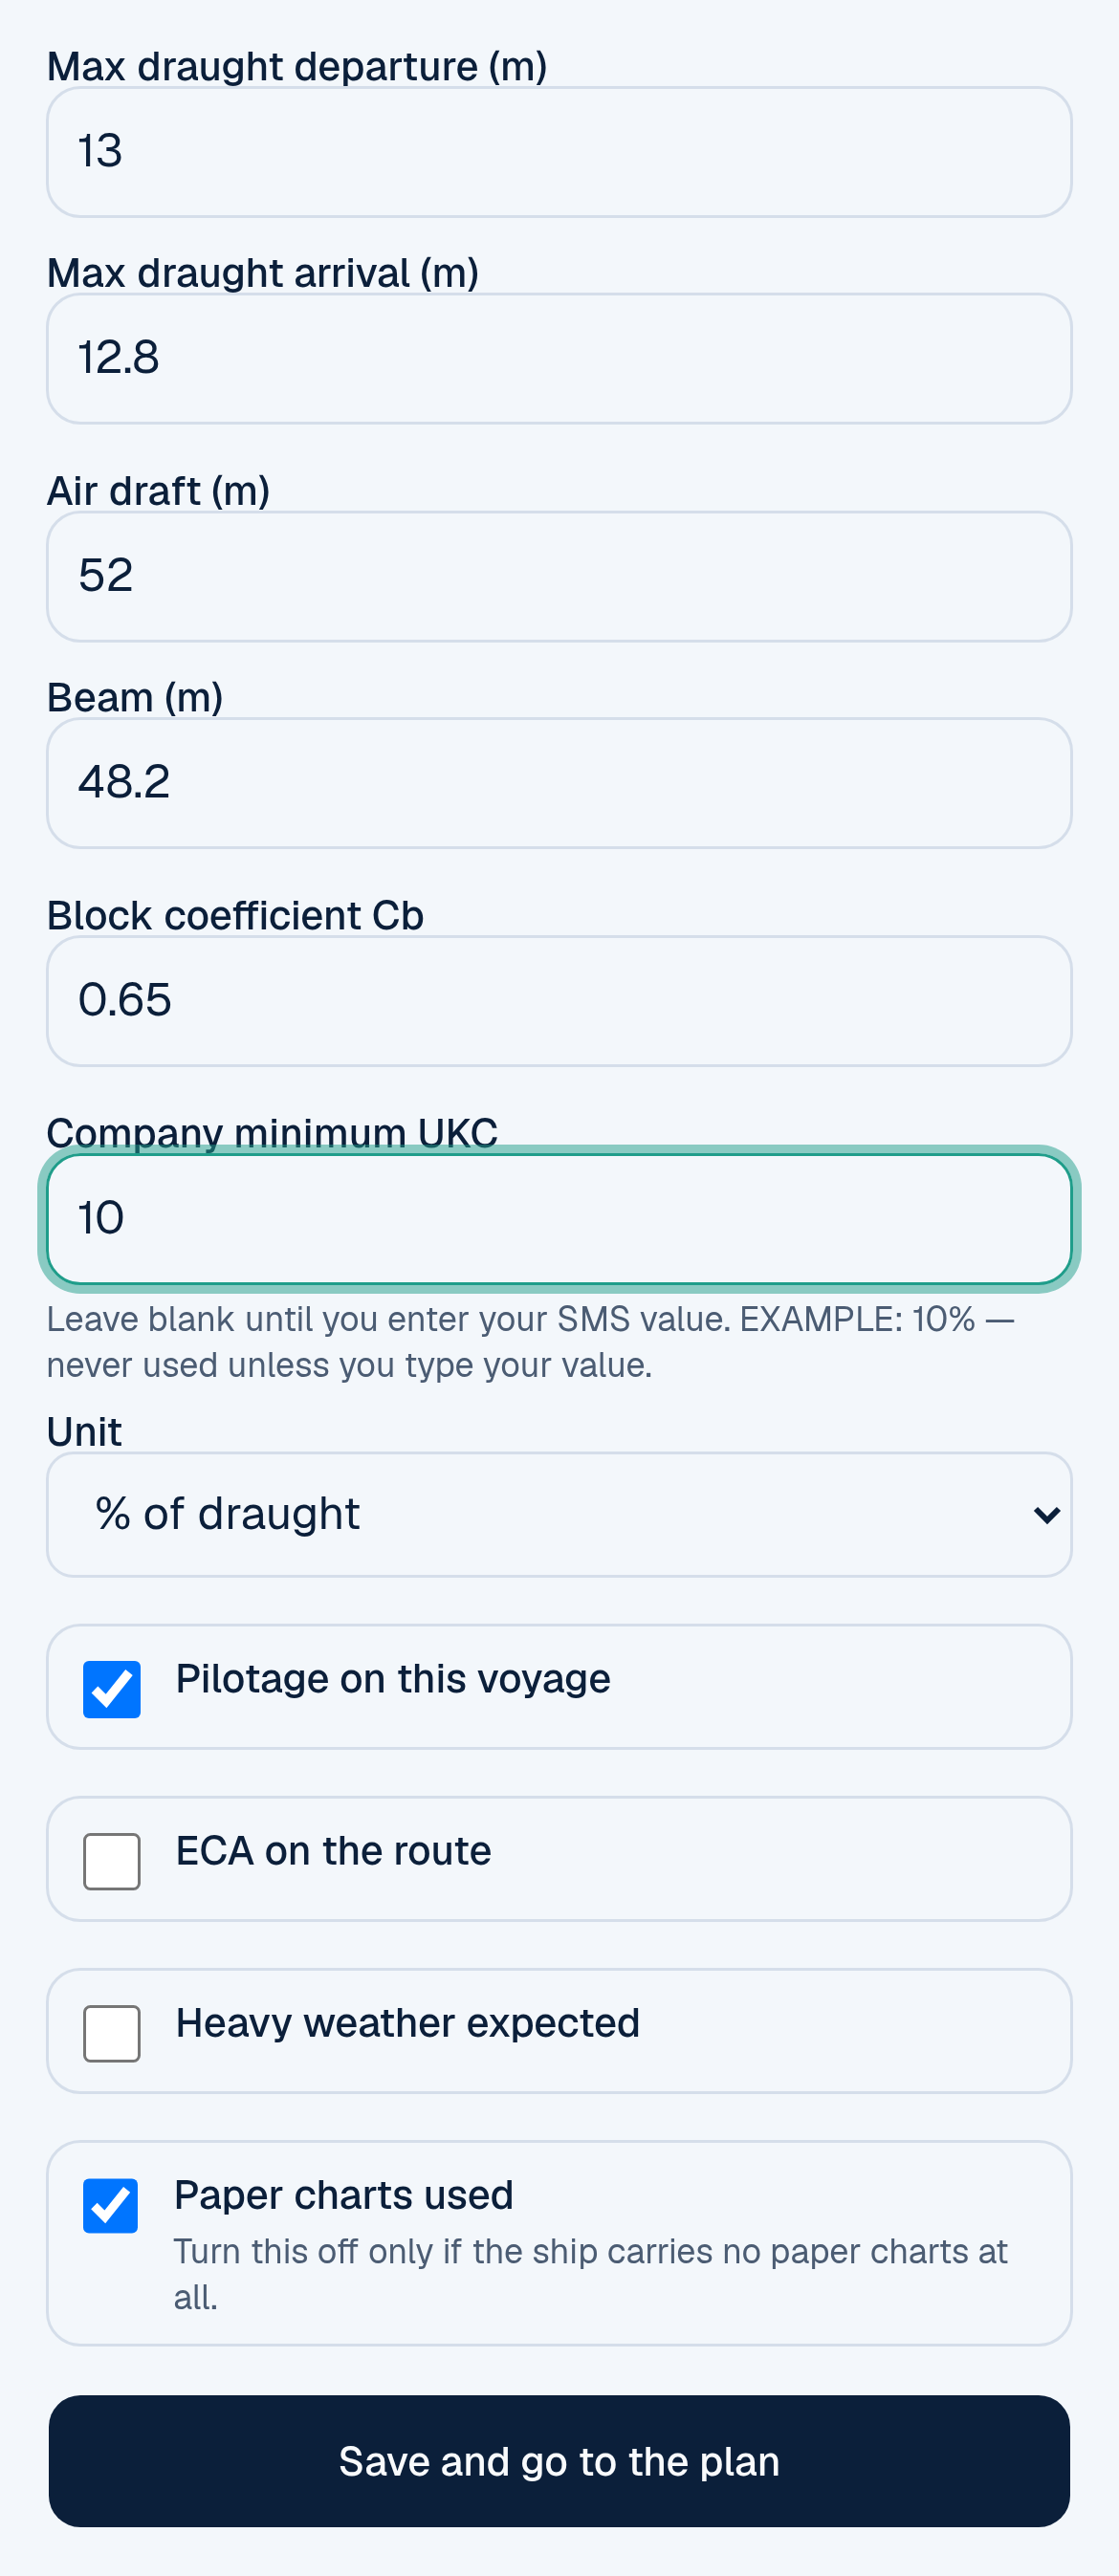
Voyage setup, part 2: the ship's figures and the four switches (example values).
Tap Save and go to the plan.
2. See the whole plan in four stages
Your plan shows the four APEM stages, each with a progress bar, the number of items done and the number of critical items done. Under each stage are its steps, each with its own count. Tap any step to open it, or tap Next step to carry on where you stopped.
With the example voyage, the stages hold:
- Appraisal (A1 to A7): the voyage and your ship; cargo, crew and documents; charts (check, order, correct); reading the area (publications, tides and weather); rules along the route; company rules and fuel; and a short appraisal summary.
- Planning (P1 to P11): drawing the route and no-go areas; depth and height under bridges; speed, turns and the safe corridor; how you will fix and monitor; engines, reports and the environment; contingency, timing and manning; building and checking the route in ECDIS; the paper chart plan; recording the plan; a self-check before inspection; and presenting the plan to the Master.
- Execution: before departure, pilotage and arrival (plus ECA and heavy weather when switched on).
- Monitoring: coastal and restricted waters, ocean passage, and changing the plan.
3. Work through each step: tick, N/A, Why? and a note
Each step opens with a one-line instruction, then its items. For each item:
- tap ✓ when it's done, or N/A if it doesn't apply to this voyage;
- items marked ★ Critical need a short note if you mark them N/A. The tool won't accept the N/A without one;
- tap Why? to see the reason for the item and the rule behind it, for example A893 §3.1 · SOLAS V/34.1;
- use Note to write what you found or decided;
- where an item needs a figure, a Calculate link opens the right calculator.
Every tick and note is saved on your phone as you go.
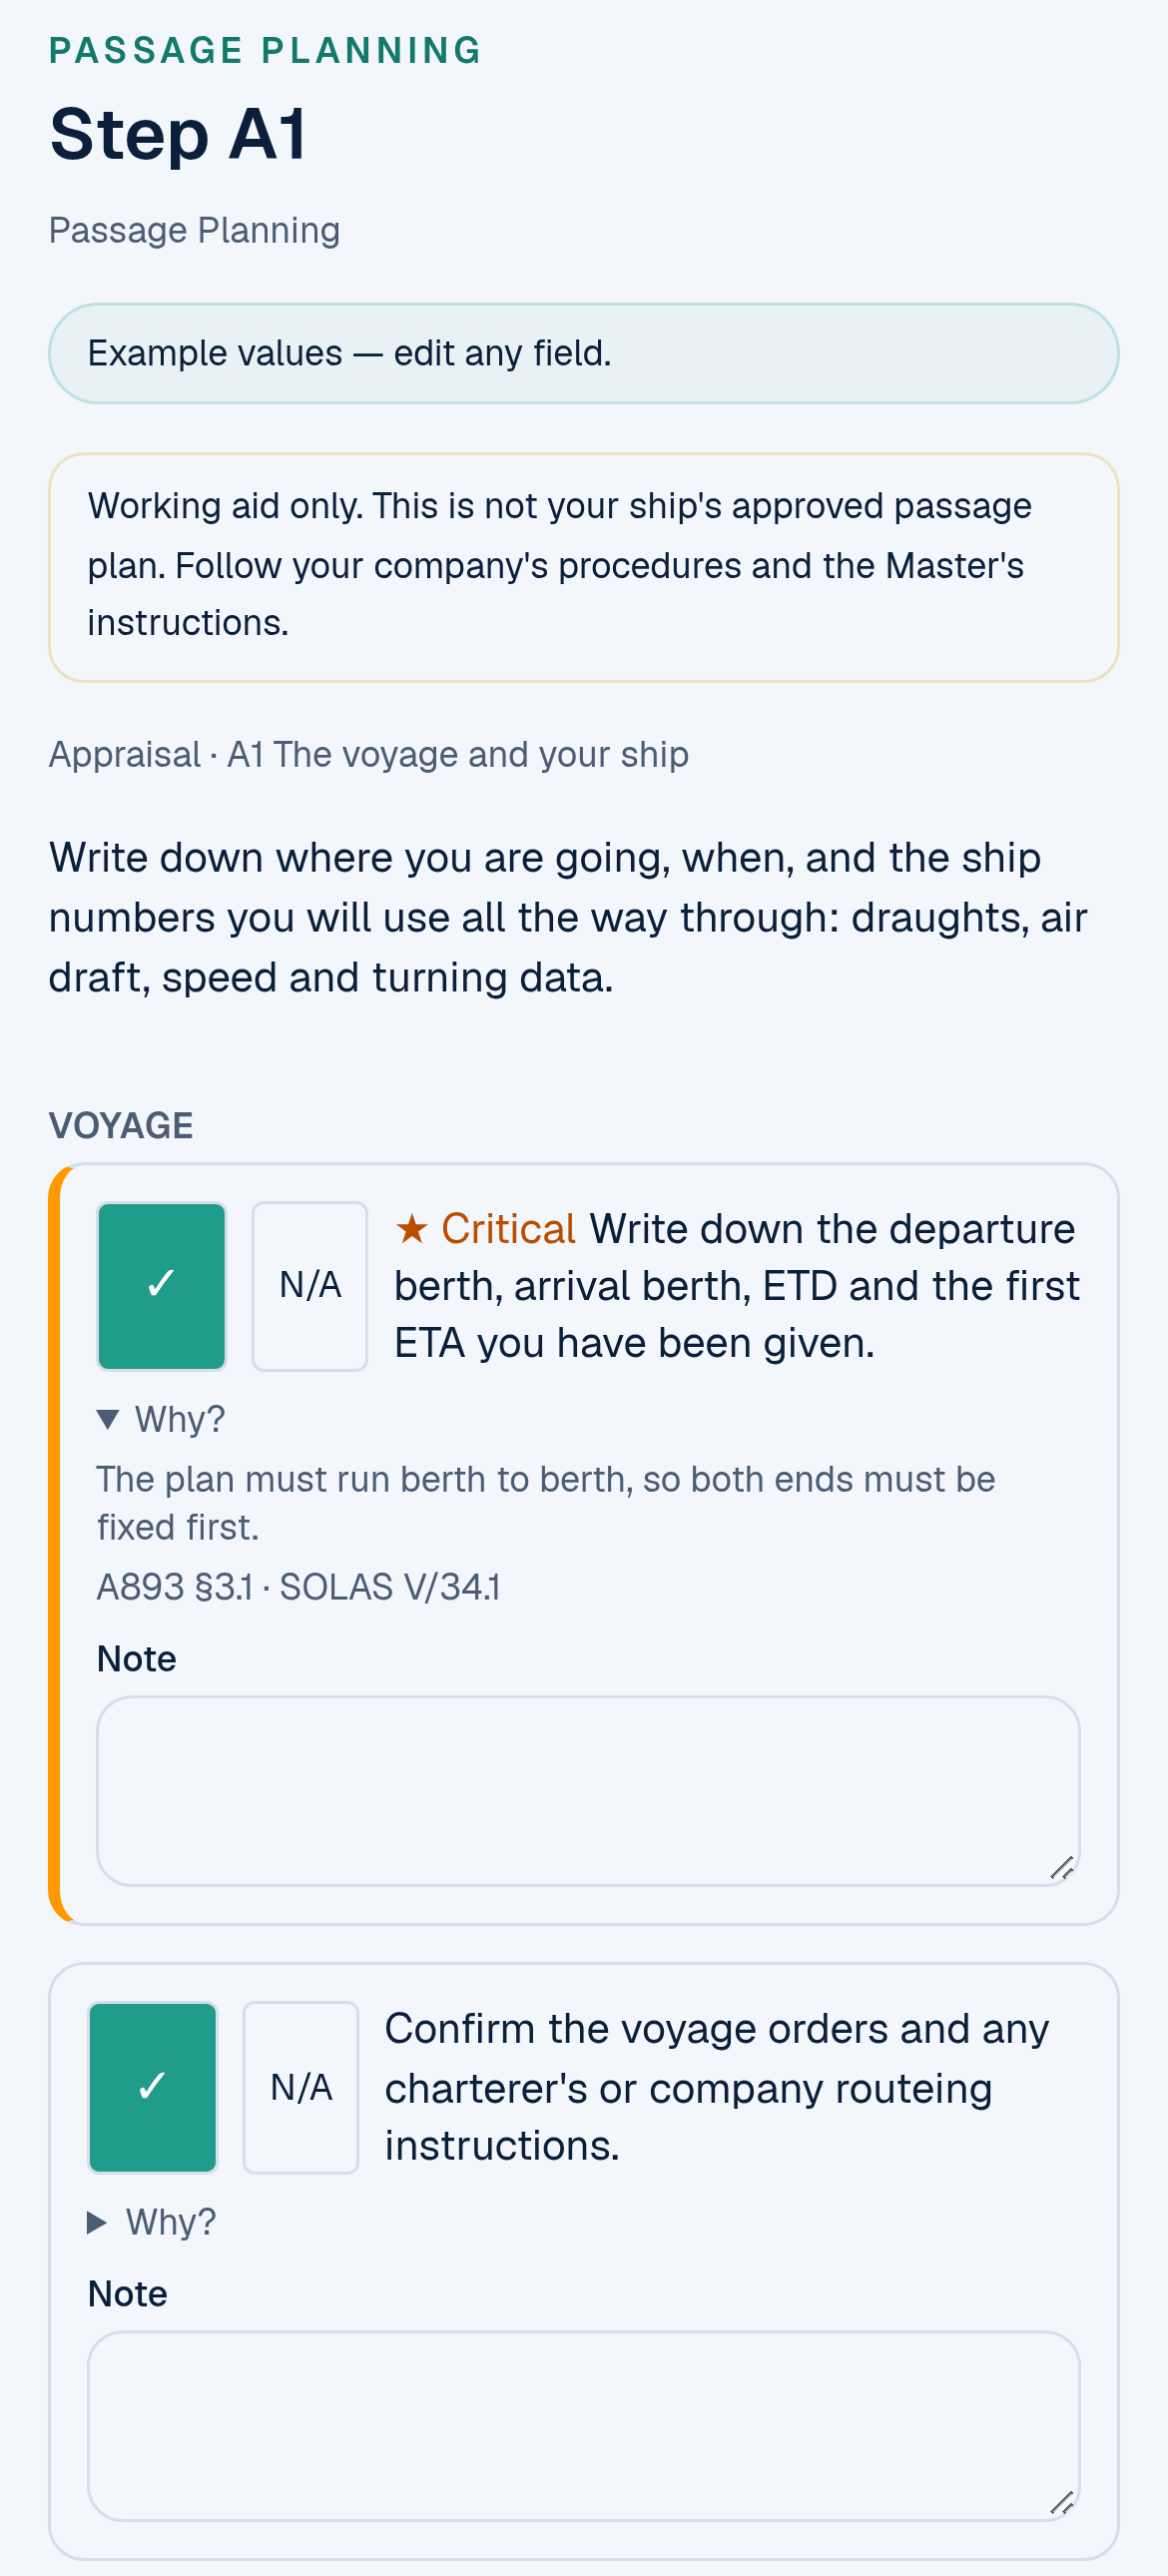
Step A1 in the Appraisal stage, with the Why? open on the first item (example values).
This is where the learning happens. Don't just tick. Read the Why? for every critical item at least once. That's how the routine turns into understanding.
4. Appraisal: know everything before you draw a line
The Appraisal steps make you collect the facts first: the draughts, air draft and turning data (A1); anything about the cargo, crew or certificates that limits the route (A2); every chart and ENC cell, corrected (A3); the Sailing Directions, Lists of Lights and Radio Signals, tides, currents and weather (A4); every routeing scheme, reporting system, protected area, load line zone and pilot boarding position (A5); and your company's UKC and ECDIS settings policy (A6). A7 asks you to write a short list of the hazards and limits you found, because that list drives the plan.
5. Planning: draw the route and set the safety values
The Planning steps turn the appraisal into a route:
- P1: lay the route berth to berth at the largest suitable scale, keep it clear of no-go areas with a margin for CATZOC and position error, and follow TSS lanes the right way.
- P2: work out the UKC for every critical shallow area and the air draft clearance under every bridge or cable. Save the results to the plan.
- P3: set the speed for each leg, the wheel-over point for each turn and the cross-track limit for each leg.
- P4: choose a primary and a secondary fixing method for each leg, and add parallel index lines, clearing bearings and clearing ranges on coastal and pilotage legs.
- P5: mark engine standby points, VTS and reporting points, and environmental areas.
- P6: mark abort points, contingency anchorages and safe deep water, and write short actions for engine failure, steering failure, loss of GNSS or ECDIS, man overboard and restricted visibility.
6. Build and check the route in ECDIS: what the checklist guides you to check
The tool doesn't connect to your ECDIS, and there's no ECDIS screen in it. What step P7, Build and check the route in ECDIS, does is guide you through what to set and check on the ship's own ECDIS, item by item:
- Settings: calculate the safety depth and safety contour for this voyage, enter them, and record both the value you entered and the contour ECDIS actually shows. Set the shallow and deep contours as your SMS says (the shallow contour never less than the draught). Set the XTD for each leg in the route table. Set the look-ahead (anti-grounding) time or distance for the speed and area. Turn on alarms or indications for TSS, areas to be avoided, PSSAs and ECAs.
- Check: run the automatic route check and fix or explain every alarm and indication. Then do a visual check of the whole route at the largest scale, leg by leg. Display CATZOC along the route and add margin where the data is poor. Make sure you are on the best-scale ENC, not overscaled data. Check curved legs and wheel-over marks against the turning data. Add user notes for T&P notices, NAVAREA warnings, PI lines, abort points and reporting points.
- Backup: load the same route and settings on the backup ECDIS, or have the paper plan ready.
- Software and record: check the ECDIS software and IHO presentation library are current, then save the route and record the route check.
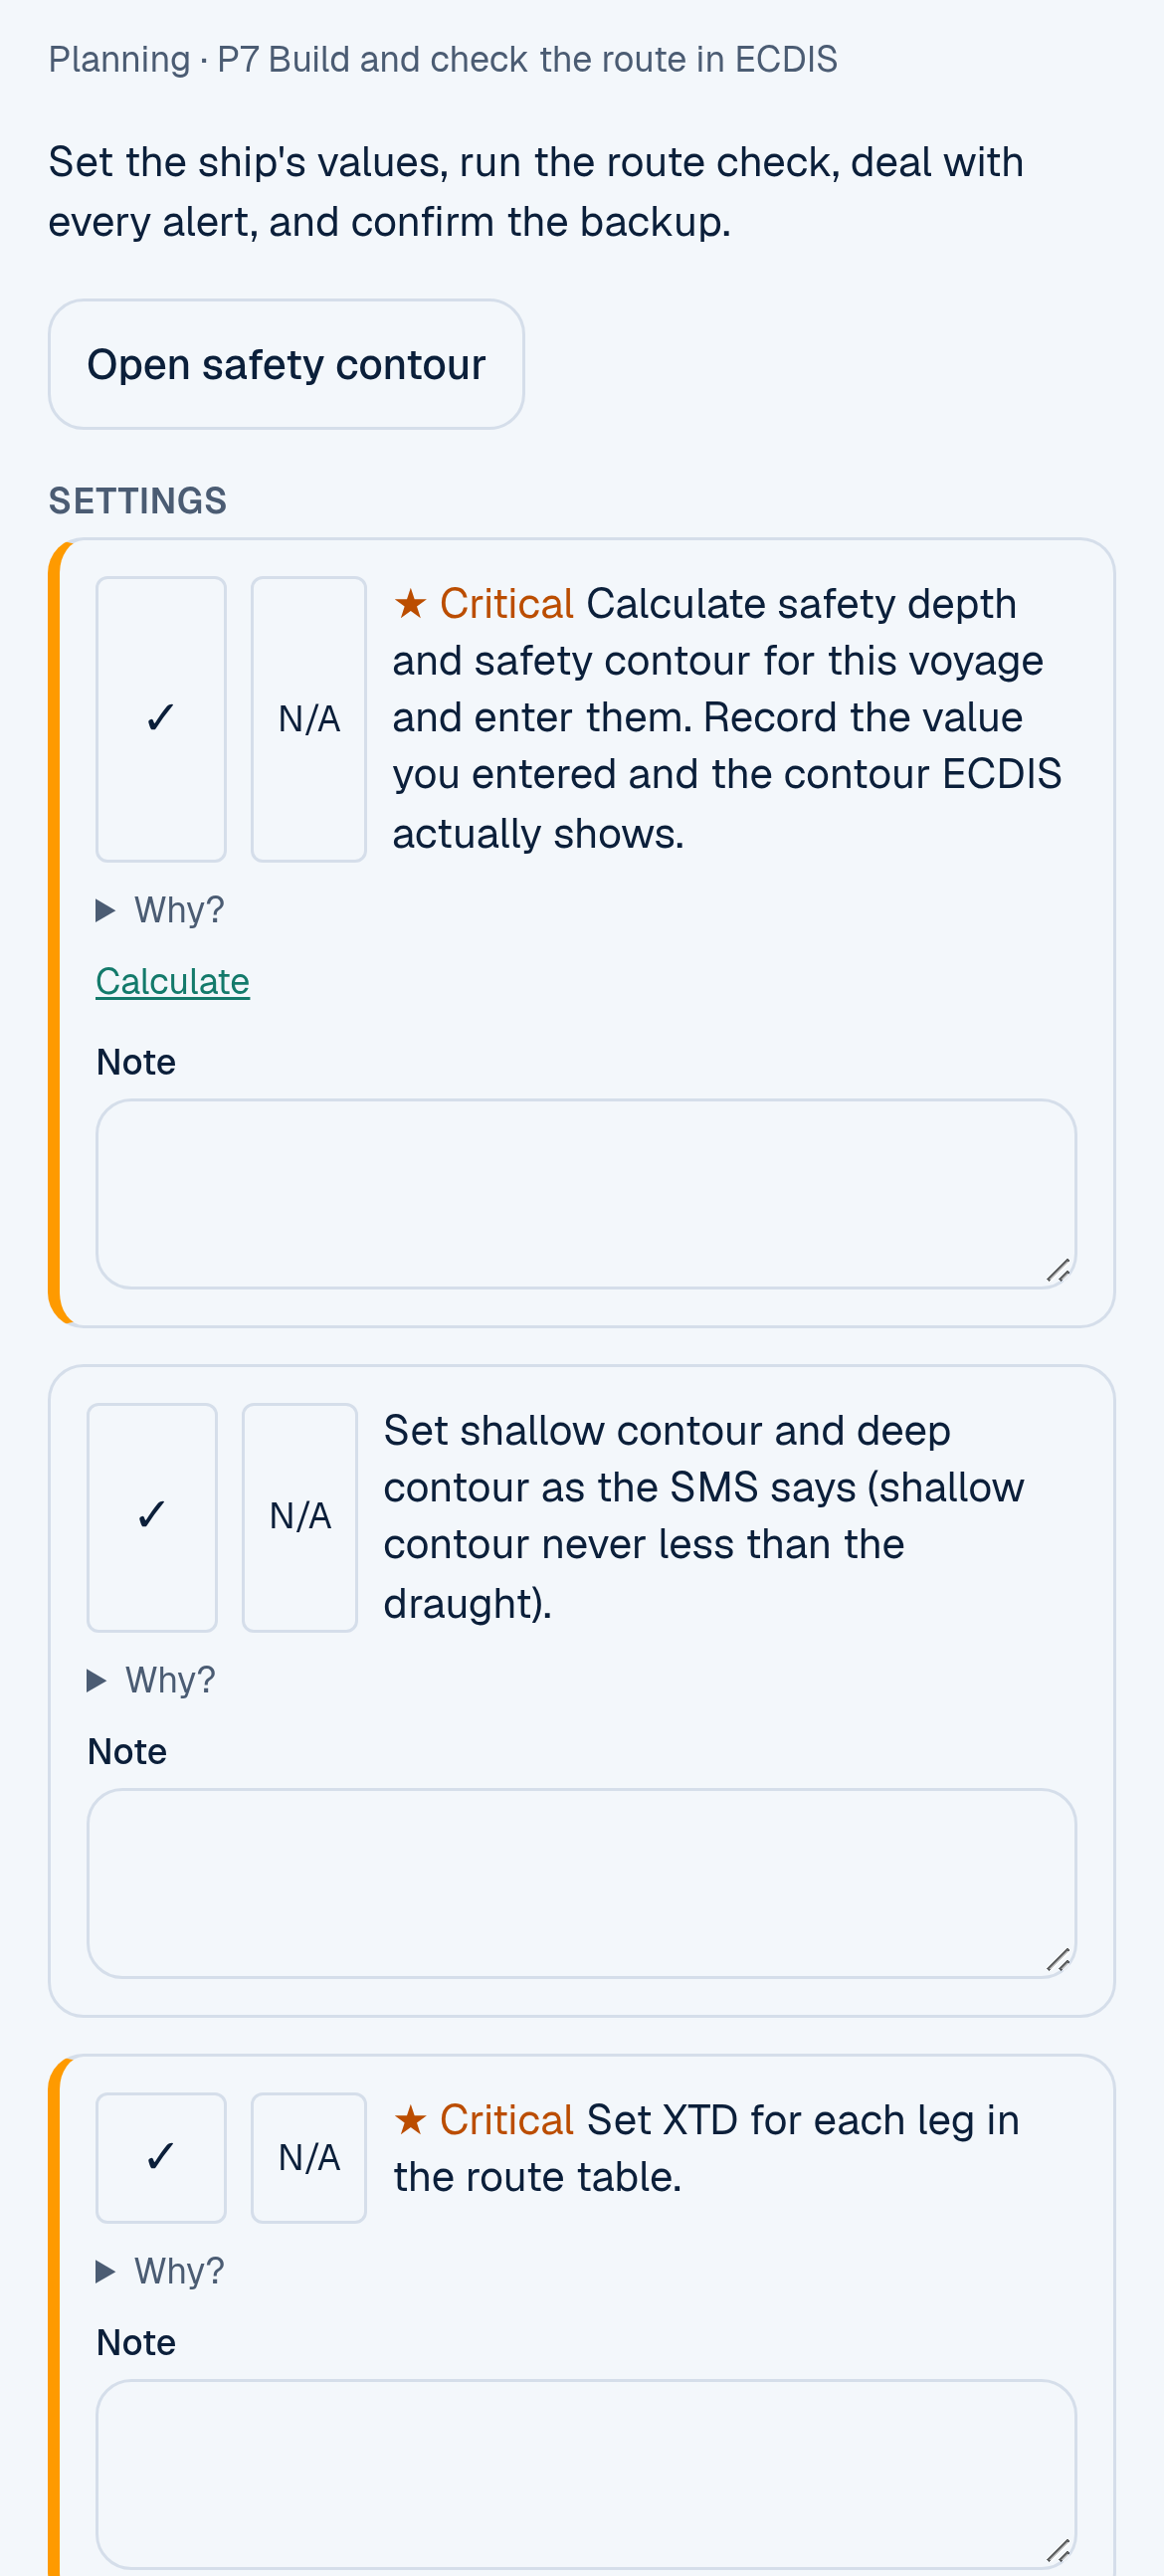
Step P7: the safety settings the checklist guides you to check on the ship's ECDIS.
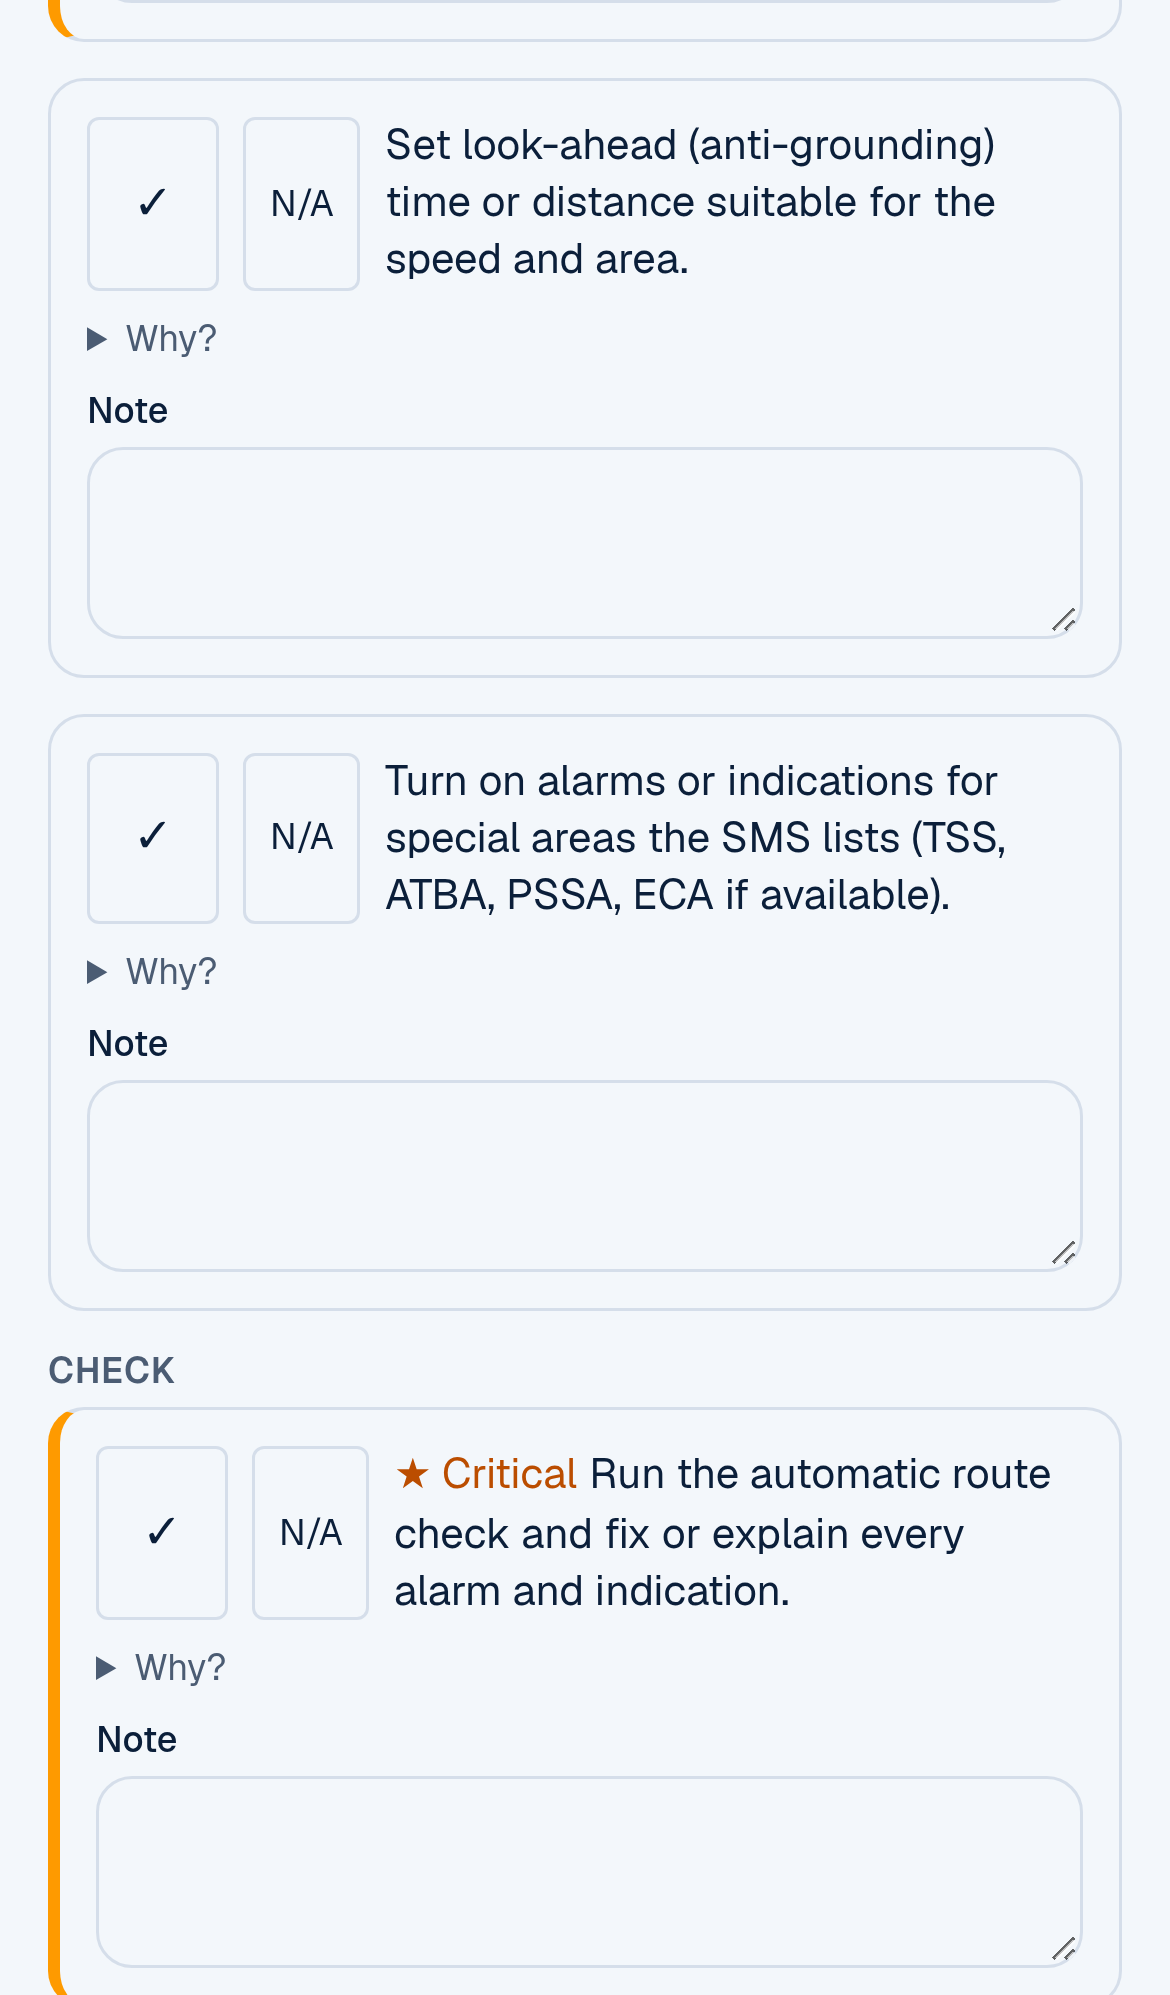
Look-ahead, alarms and the route check, all in step P7.
The Open safety contour button takes you to a small worksheet that adds up the safety depth and shows which contour ECDIS will use. See the worked example below.
7. The paper chart step
If Paper charts used is on, step P8, Paper chart plan, appears. It walks you through the paper side of the plan the way a good 2nd Officer does it:
- choose the charts from the chart catalogue (NP131 or the ADMIRALTY Digital Catalogue), at the largest suitable scale;
- check every chart is the latest edition (with the Cumulative List of Notices to Mariners, NP234), apply every permanent correction and write the NM number and year;
- plot T&P notices in pencil and the navigational warnings in force, and keep the correction log;
- lay off each leg in pencil with the true course and distance, then mark wheel-over points, no-go areas, parallel index lines, clearing bearings, fixing methods, abort points, contingency anchorages, chart changeover positions, reporting points and TSS;
- check the chart's horizontal datum (and any note on adjusting GNSS positions), the vertical datums and the survey information.
If you also use ECDIS, the step reminds you to check that the paper plan and the ECDIS route match.
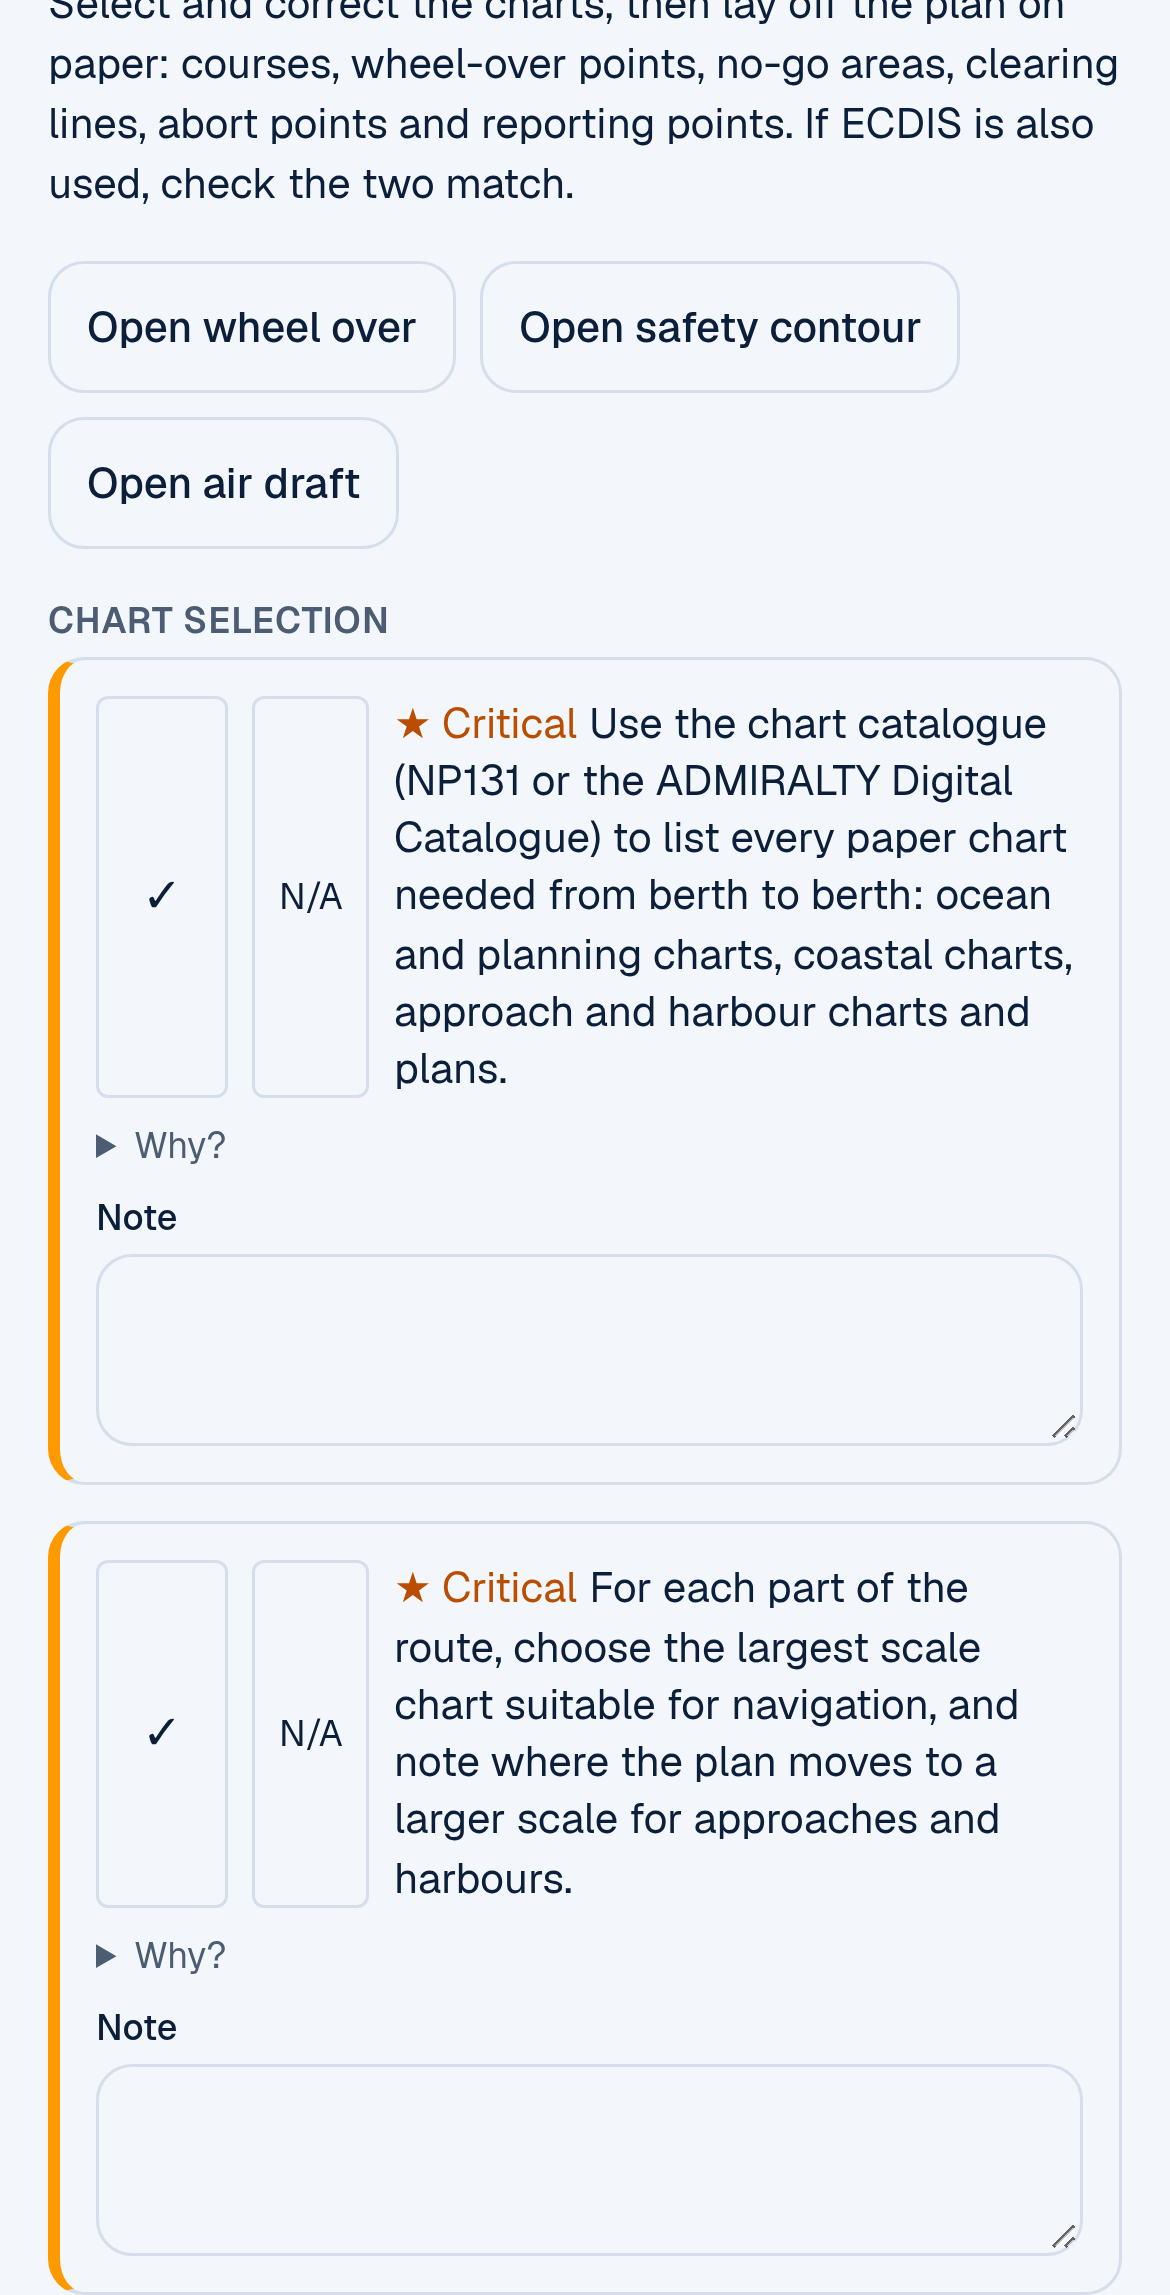
Step P8, the paper chart plan. It shows when Paper charts used is switched on.
8. The publication checklist
From steps A3 and A5, tap Open publication checklist. Pick a route preset (for example Manila to Singapore) or add the places on your voyage with Add areas. The tool lists the official books and parts to hold or check for those areas: chart catalogues and Notices to Mariners, Sailing Directions, Lists of Lights, Lists of Radio Signals, tide tables, the NAVAREA coordinator, national publications and official links.
It lists titles and volume numbers only. It doesn't supply the publications, and editions change. The screen says it plainly: "Titles and numbers only. Verify against the current catalogue and corrected publication." Lines it isn't sure about say "Possibly needed, confirm in the catalogue". Tick each line once you hold the latest edition, corrected, and tap Save to plan.
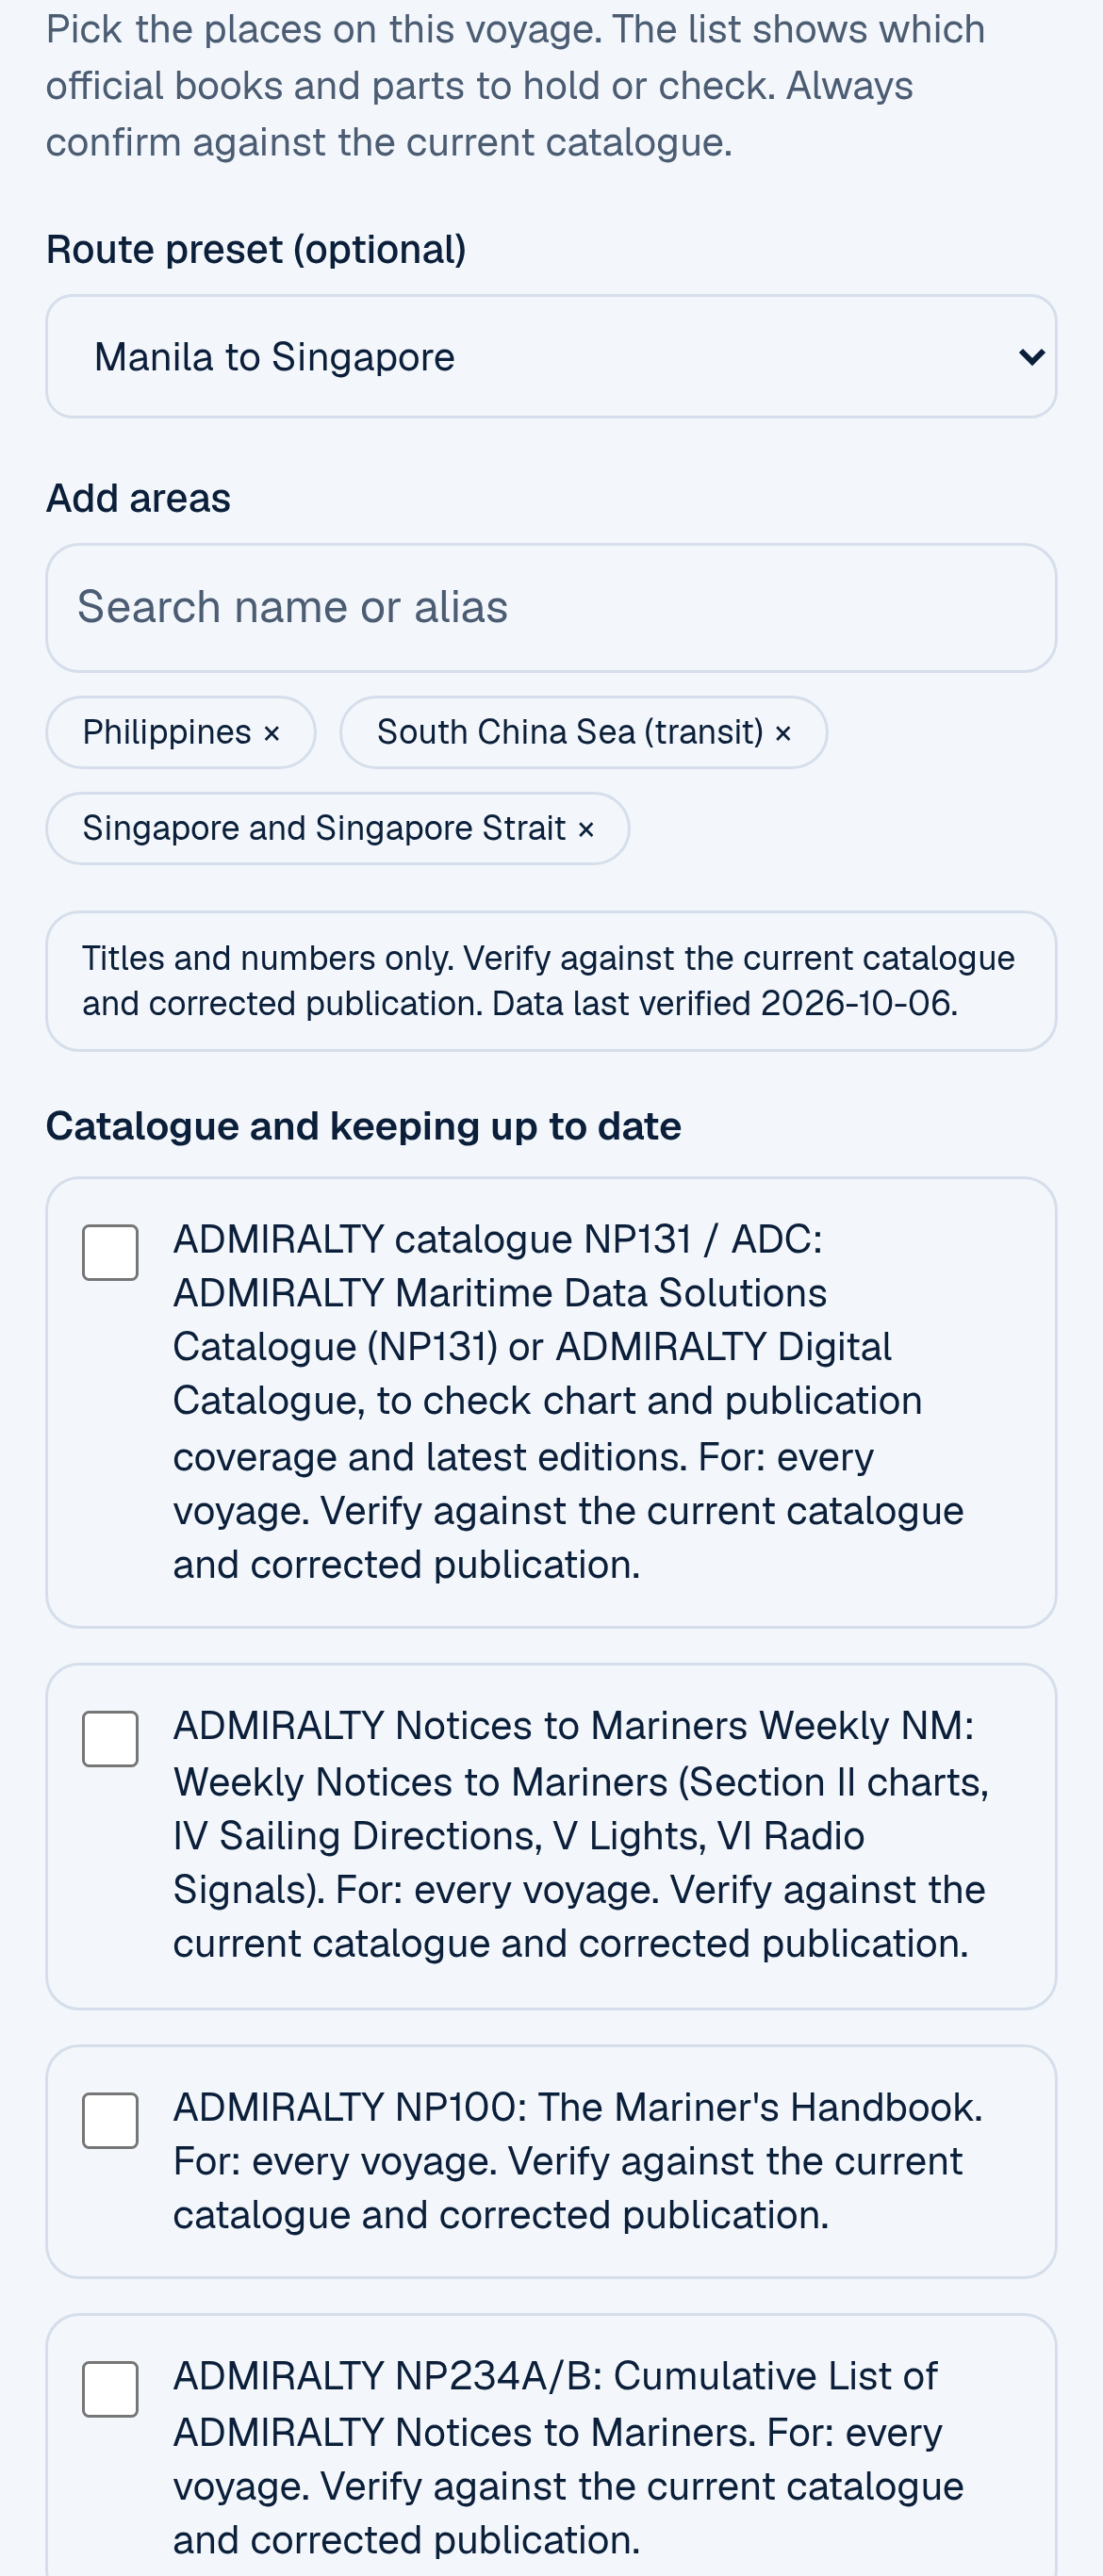
The publication checklist for the Manila to Singapore preset.
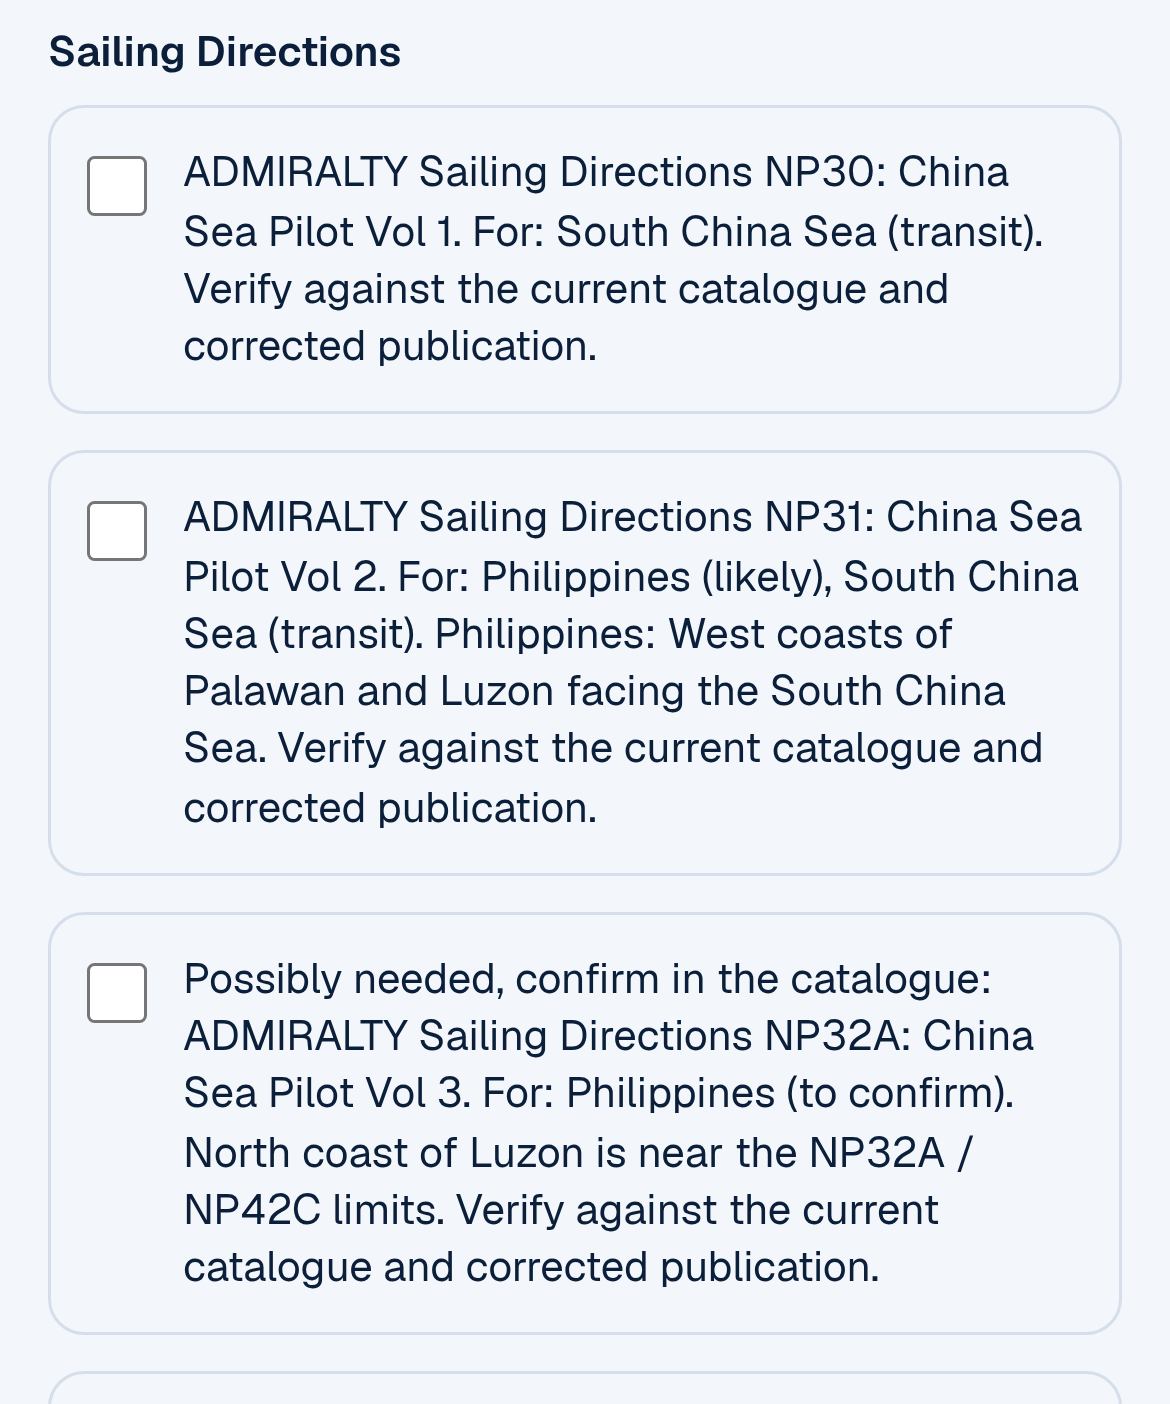
Lines the tool isn't sure about say "Possibly needed, confirm in the catalogue".
If a place isn't in the tool's data yet, it tells you so and points you to the ADMIRALTY catalogue and the national hydrographic office.
9. Execution and Monitoring
The last two stages follow the plan out of the port and across the sea:
- E1, Before departure: re-check the ETD and tidal windows, compare the actual draughts with the plan (and recalculate UKC and the safety contour if they differ), test the steering gear and bridge equipment, and confirm both ECDIS have the approved route active with the right settings.
- E2, Pilotage: exchange information with the pilot, keep monitoring with PI and visual checks as well as ECDIS, and compare the echo sounder with the planned UKC.
- E5, Arrival: update the plan for the latest conditions, confirm the arrival draught and brief the bridge team on abort points, PI and speed.
- M1 to M3: fix at the planned interval with an independent method, watch the cross-track error and investigate any XTD alarm at once, check the echo sounder, watch each wheel-over, read every new warning, and know what to do if the plan must change.
10. Briefing summary and print
Tap Briefing summary for a working summary: the plan line, progress for each stage, every open critical item and your saved calculator results. Tap Print for a copy to brief from. The summary says clearly that it isn't the approved plan: the Master approves the plan on the ship's own form.
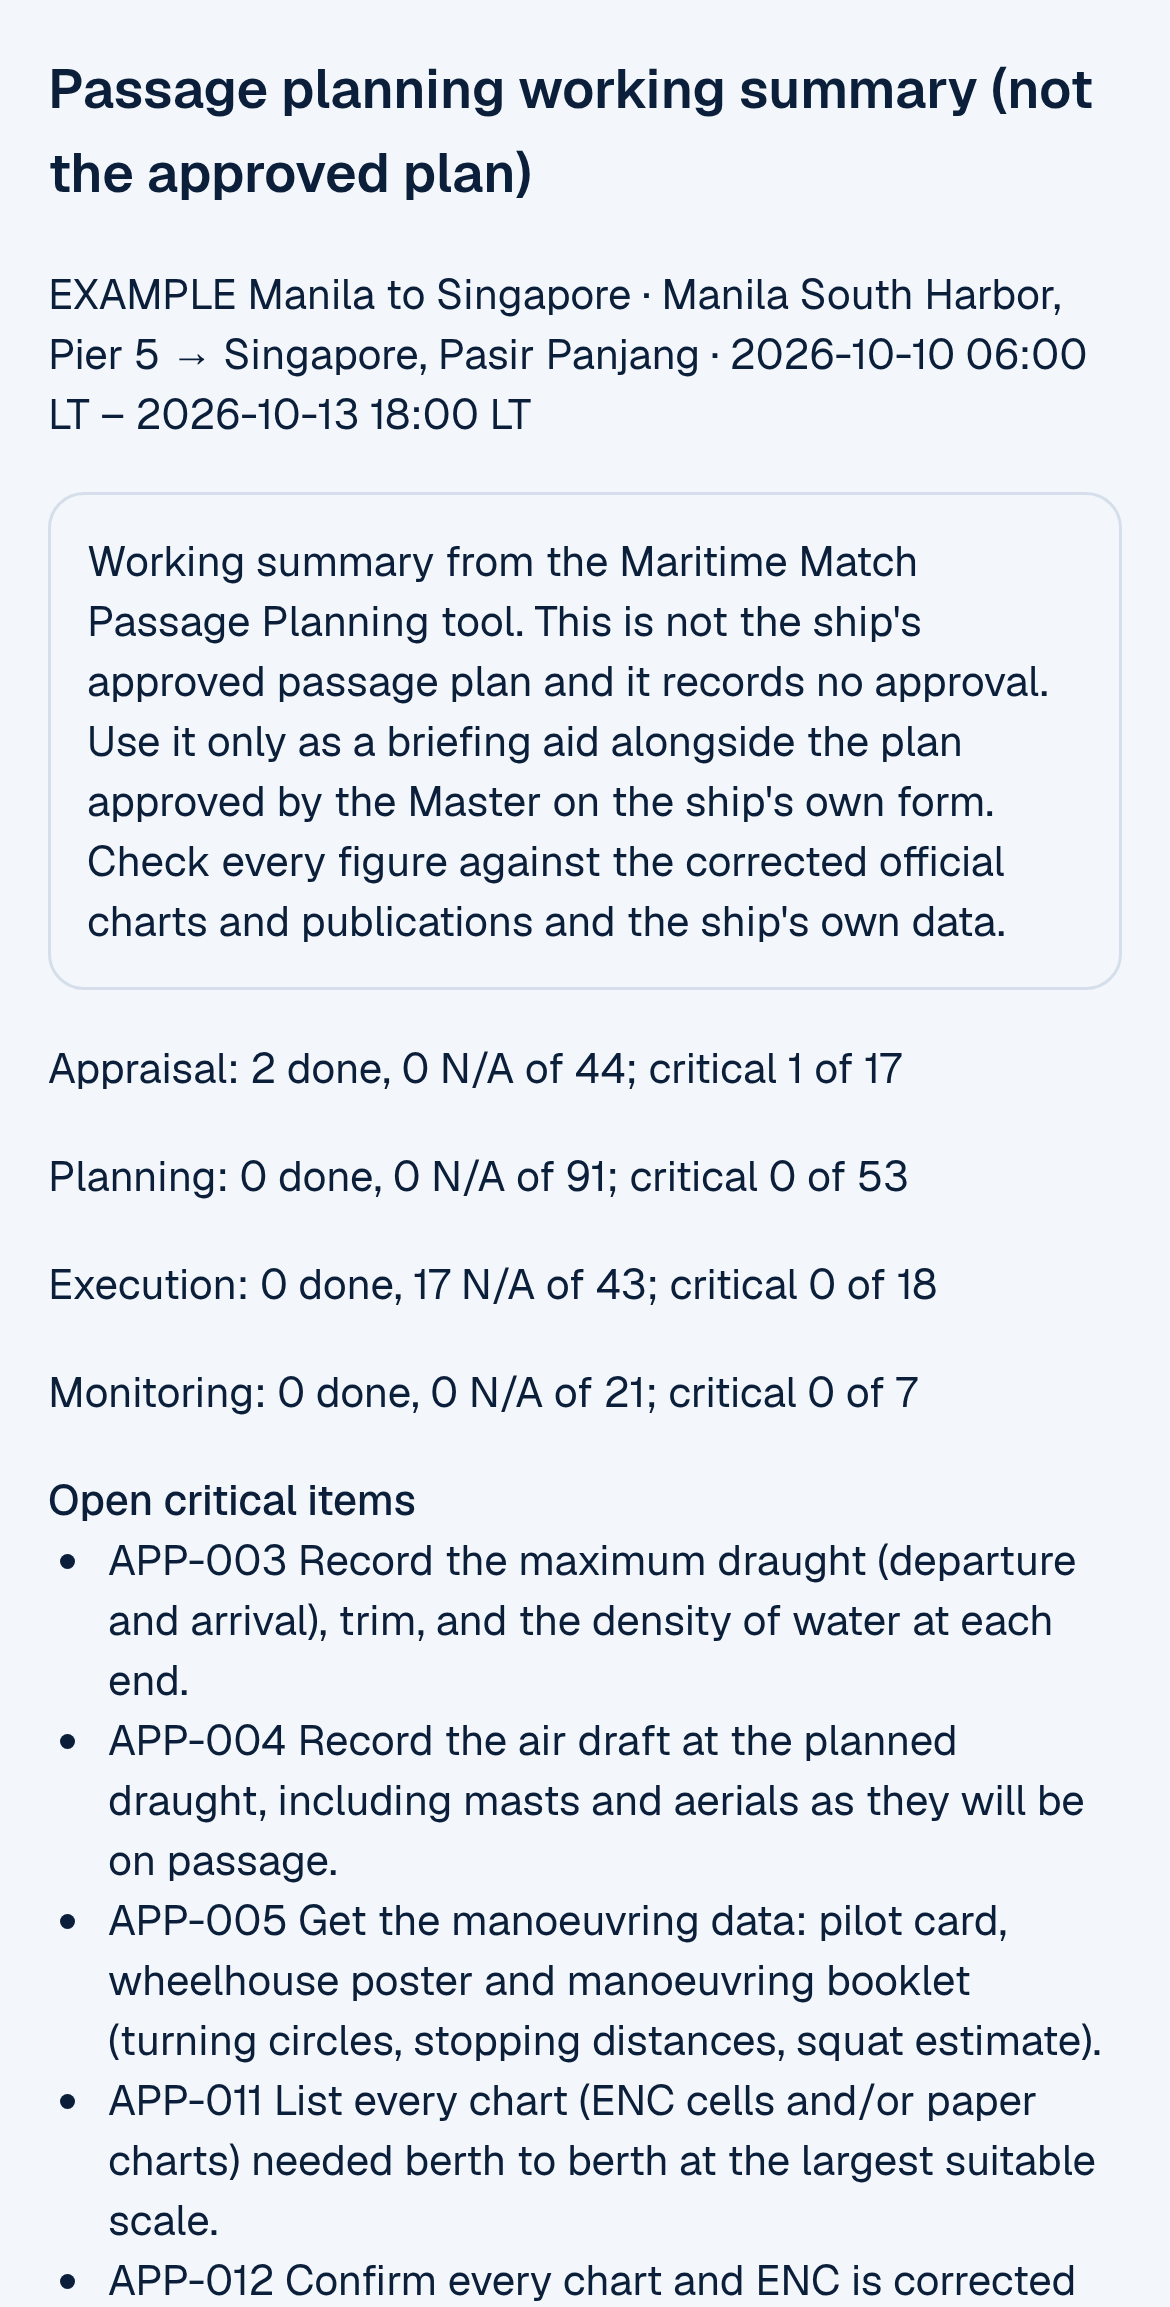
The briefing summary: a working copy to brief from, not the approved plan (example values).
How the plan ties into your bridge equipment
A good passage plan isn't just a line in ECDIS. It tells you how each piece of bridge equipment will help you keep to that line. These are the ties the checklist builds in:
| Equipment | What the checklist guides you to do | Where in the tool |
|---|---|---|
| ECDIS (main and backup) | Safety depth and contour, shallow and deep contours, XTD per leg, look-ahead, alarms, route check, the same route on the backup | A6, P7, E1, M3 |
| Radar | Parallel index lines and clearing ranges planned, then used to check position independently | P4, P8, E2, M1 |
| Echo sounder | Compare the depth with the planned UKC and the expected depth | E2, M1 |
| GNSS | Check the chart datum note before plotting GNSS positions, cross-check GNSS with another method, and plan for loss of GNSS | P6, P8, M2, P10 |
| AIS, gyro, log | Check their condition during appraisal; gyro error each watch | A1, E1, M2 |
The checklist doesn't have a BNWAS item. As general bridge practice, make sure the bridge navigational watch alarm system is on and set as your SMS and the Master's standing orders require whenever the ship is under way.
One idea runs through all of it: don't rely on one source. The P10 self-check says it plainly: monitoring must use independent methods, "not GNSS shown twice".
EXAMPLE: UKC, squat and the safety contour for a Manila to Singapore plan
EXAMPLE FIGURES. Practice values, not from a real ship or a real chart. Use your own ship's data, your company's UKC policy and the corrected official charts and tide tables.
Your ship is at a maximum draught of 13.0 m with a block coefficient of 0.65. Your company minimum UKC is 10% of draught = 1.30 m. On one leg the chart shows 15.0 m, the predicted tide is 1.6 m, you allow 0.3 m for swell, and the ENC data is CATZOC B. You plan 10 knots.
Open the UKC calculator from step P2. It takes the draught, Cb and company minimum from your voyage setup.
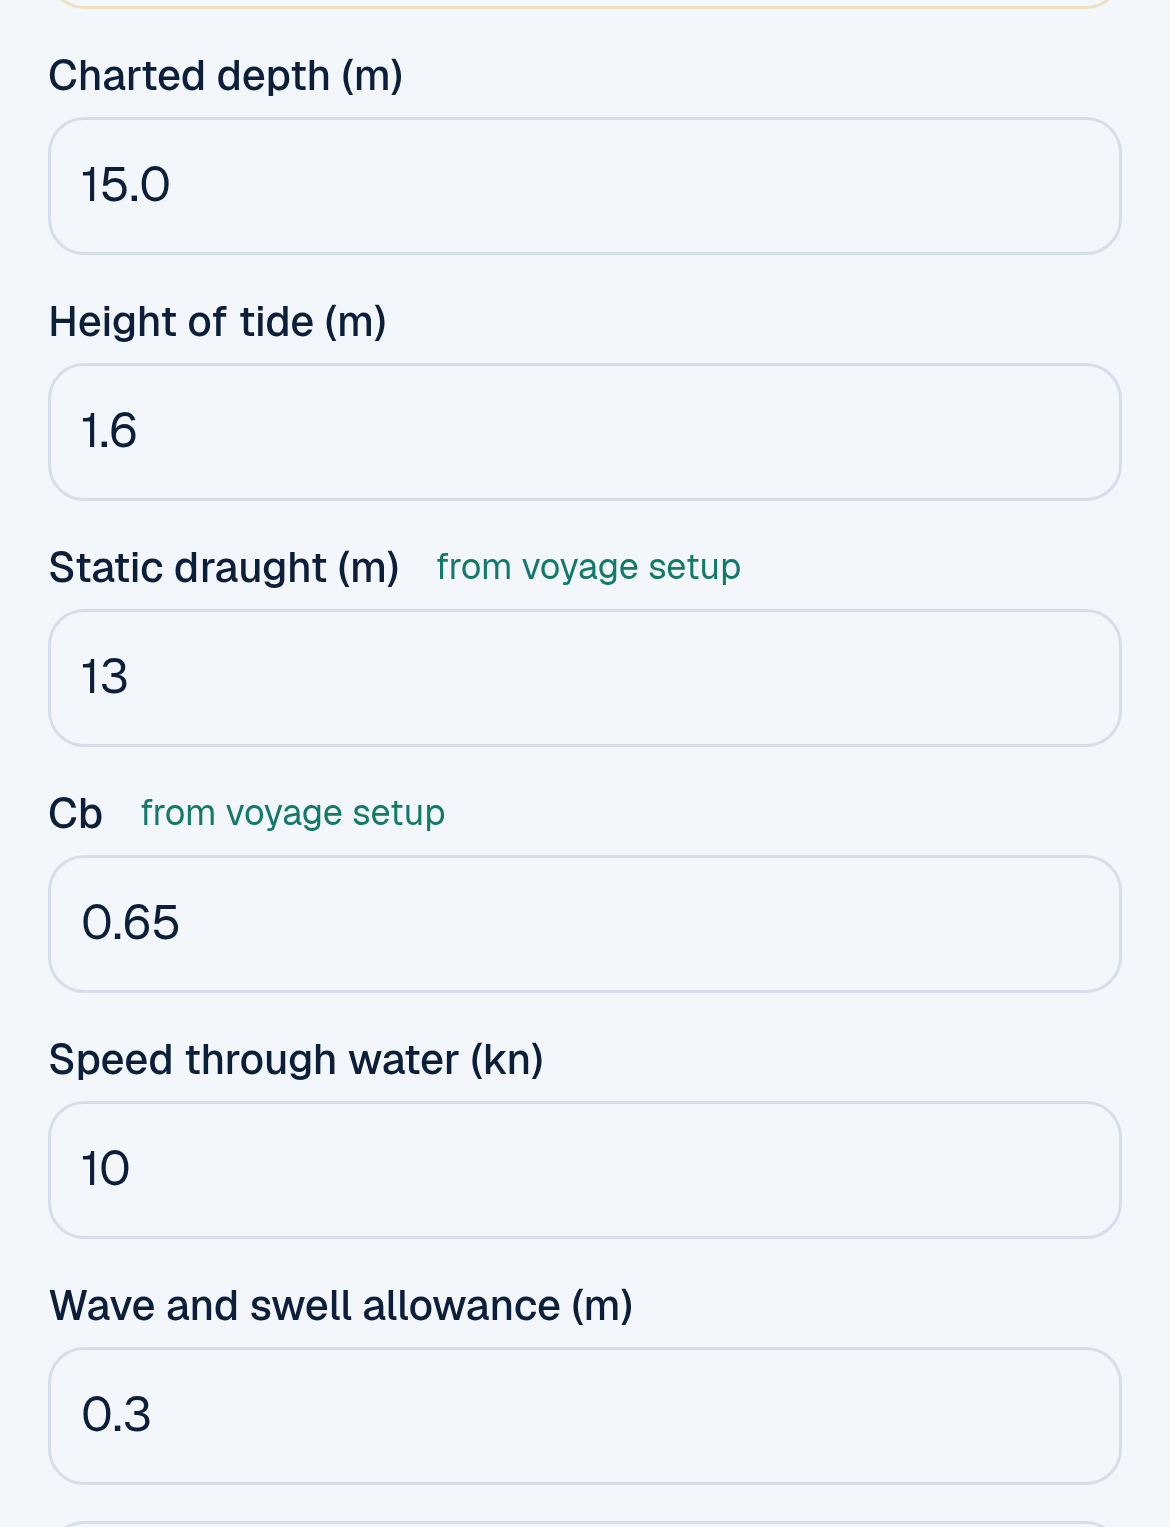
The UKC calculator, with three values filled in from your voyage setup (example values).
What the tool works out:
| Line | Result |
|---|---|
| Depth of water | 15.0 + 1.6 = 16.60 m |
| Squat (open water, 10 kn) | ≈ 0.650 m |
| Dynamic draught (13.0 + 0.650 + 0.3 swell) | 13.950 m |
| Gross UKC | 2.650 m |
| CATZOC B allowance | 1.30 m |
| Net UKC (after CATZOC) | 1.350 m |
| Against company minimum 1.30 m | PASS, margin 0.050 m |
| Highest speed for company minimum UKC | ≈ 10.38 kn |
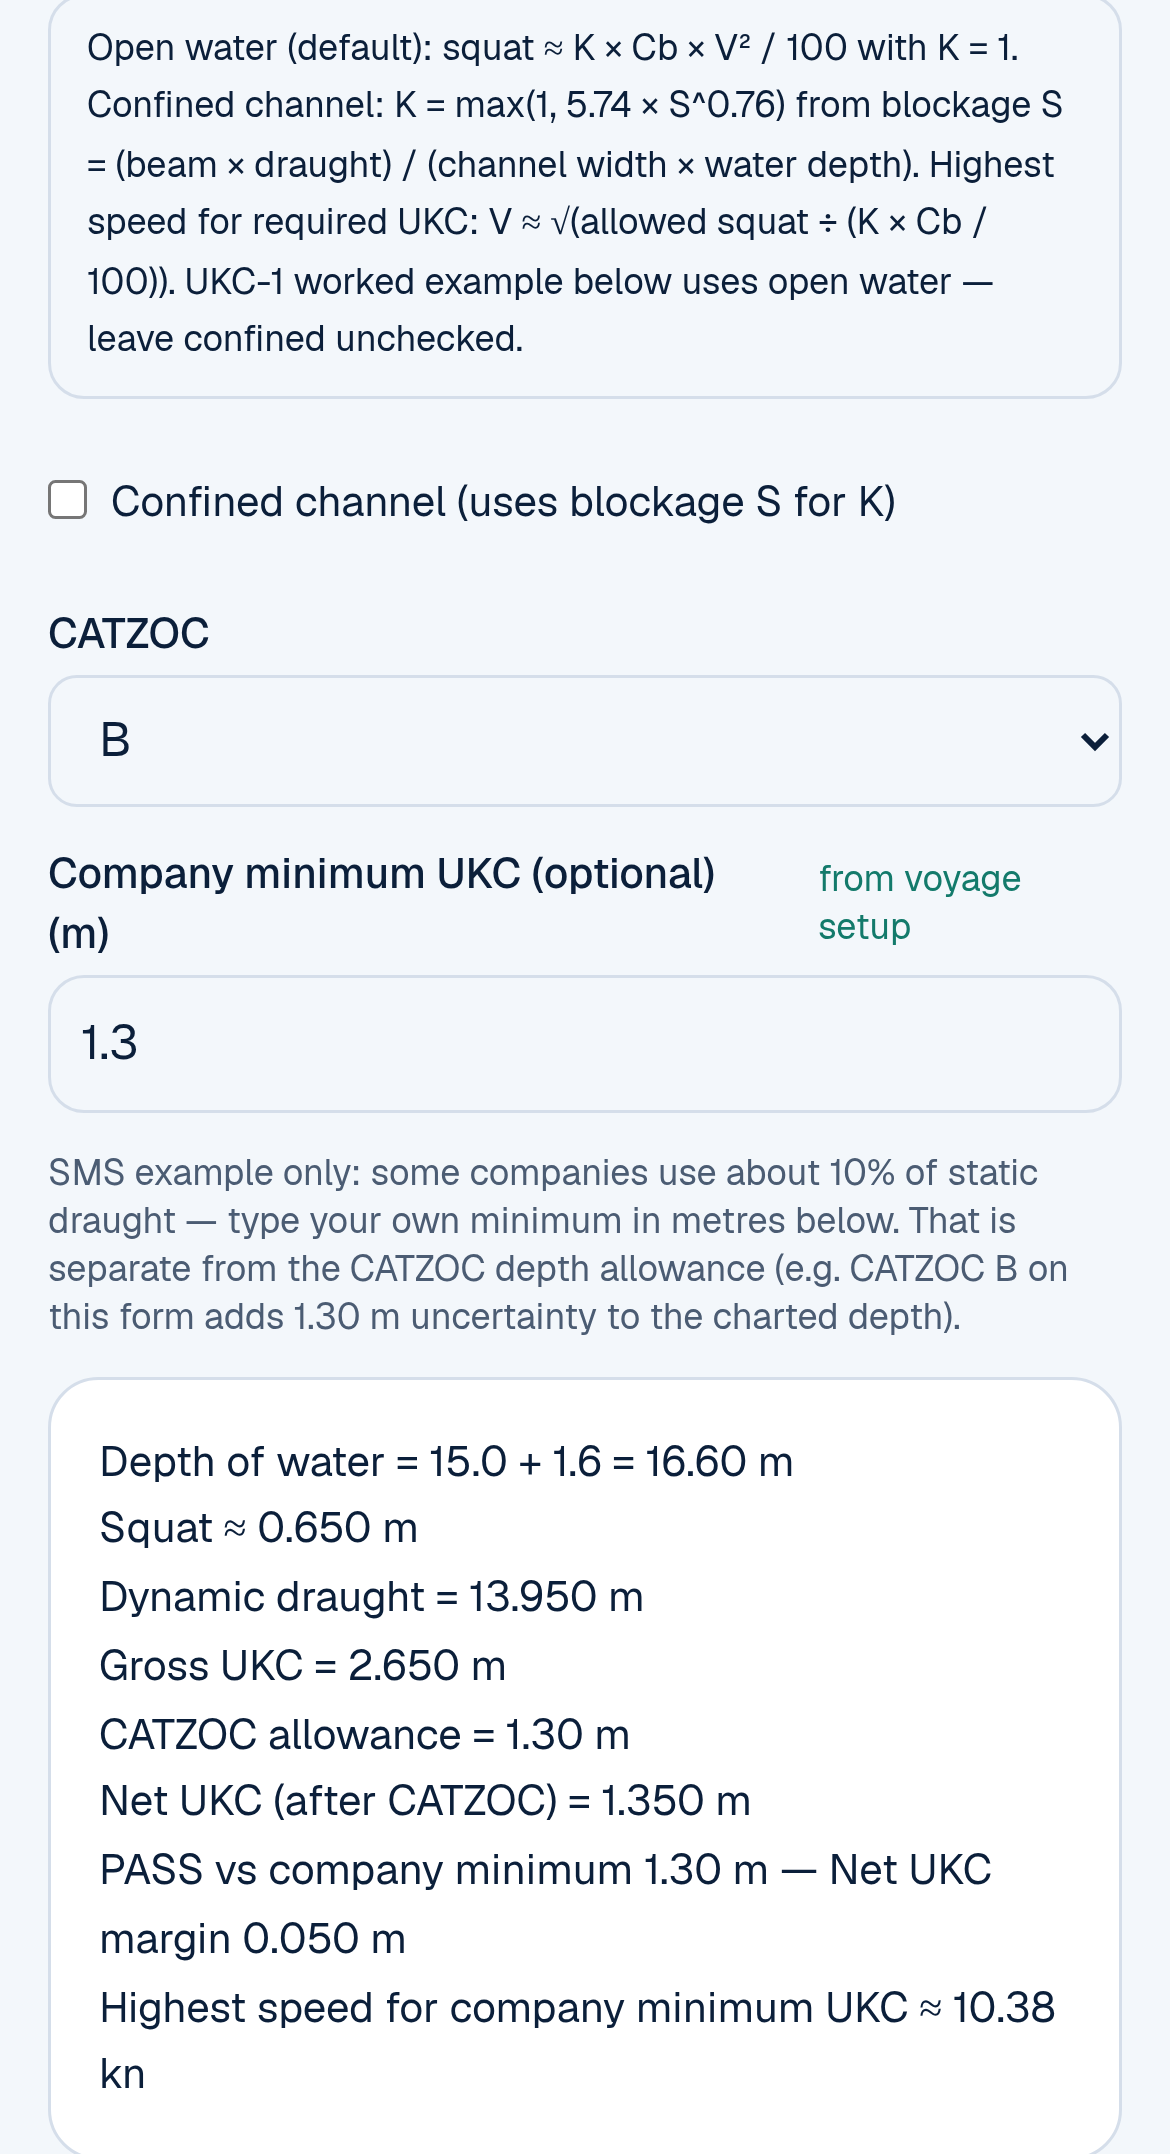
The result: net UKC 1.350 m, just 0.050 m above the company minimum (example values).
Now see what speed does. The squat estimate on screen is the Barrass method: in open water, squat ≈ Cb × V² ÷ 100, so 0.65 × 10 × 10 ÷ 100 = 0.65 m. Change the speed to 11 knots and the tool shows:
- squat ≈ 0.787 m (0.65 × 11 × 11 ÷ 100);
- net UKC 1.214 m;
- short of the company minimum by 0.086 m.
One knot more and the leg no longer meets your company's UKC. That's why the tool also gives the highest speed for the minimum, here about 10.38 knots. In a narrow channel squat is bigger still. Tick Confined channel and the tool uses the channel width and depth to work out a larger factor.
From UKC to the ECDIS safety contour. Tap Save to plan on the UKC result, then open Safety contour from step P7. The tool fills in the figures from your plan:
- max draught 13 m and company UKC margin 1.3 m (10% of 13.0 m), from your voyage setup;
- squat 0.65 m, from the UKC result you just saved;
- CATZOC allowance 1.30 m;
- tide counted on 0 m. Counting on no tide is the cautious choice for a contour you'll use on the whole passage. If you do count tide, the tool reminds you to confirm it against your SMS.
The tool shows safety depth 16.25 m (13 + 1.3 + 0.65 + 1.30), and "Contour ECDIS will show = 20 m", because 20 m is the next deeper contour in the list. That's the figure you record in P7: the value you entered and the contour ECDIS actually shows.
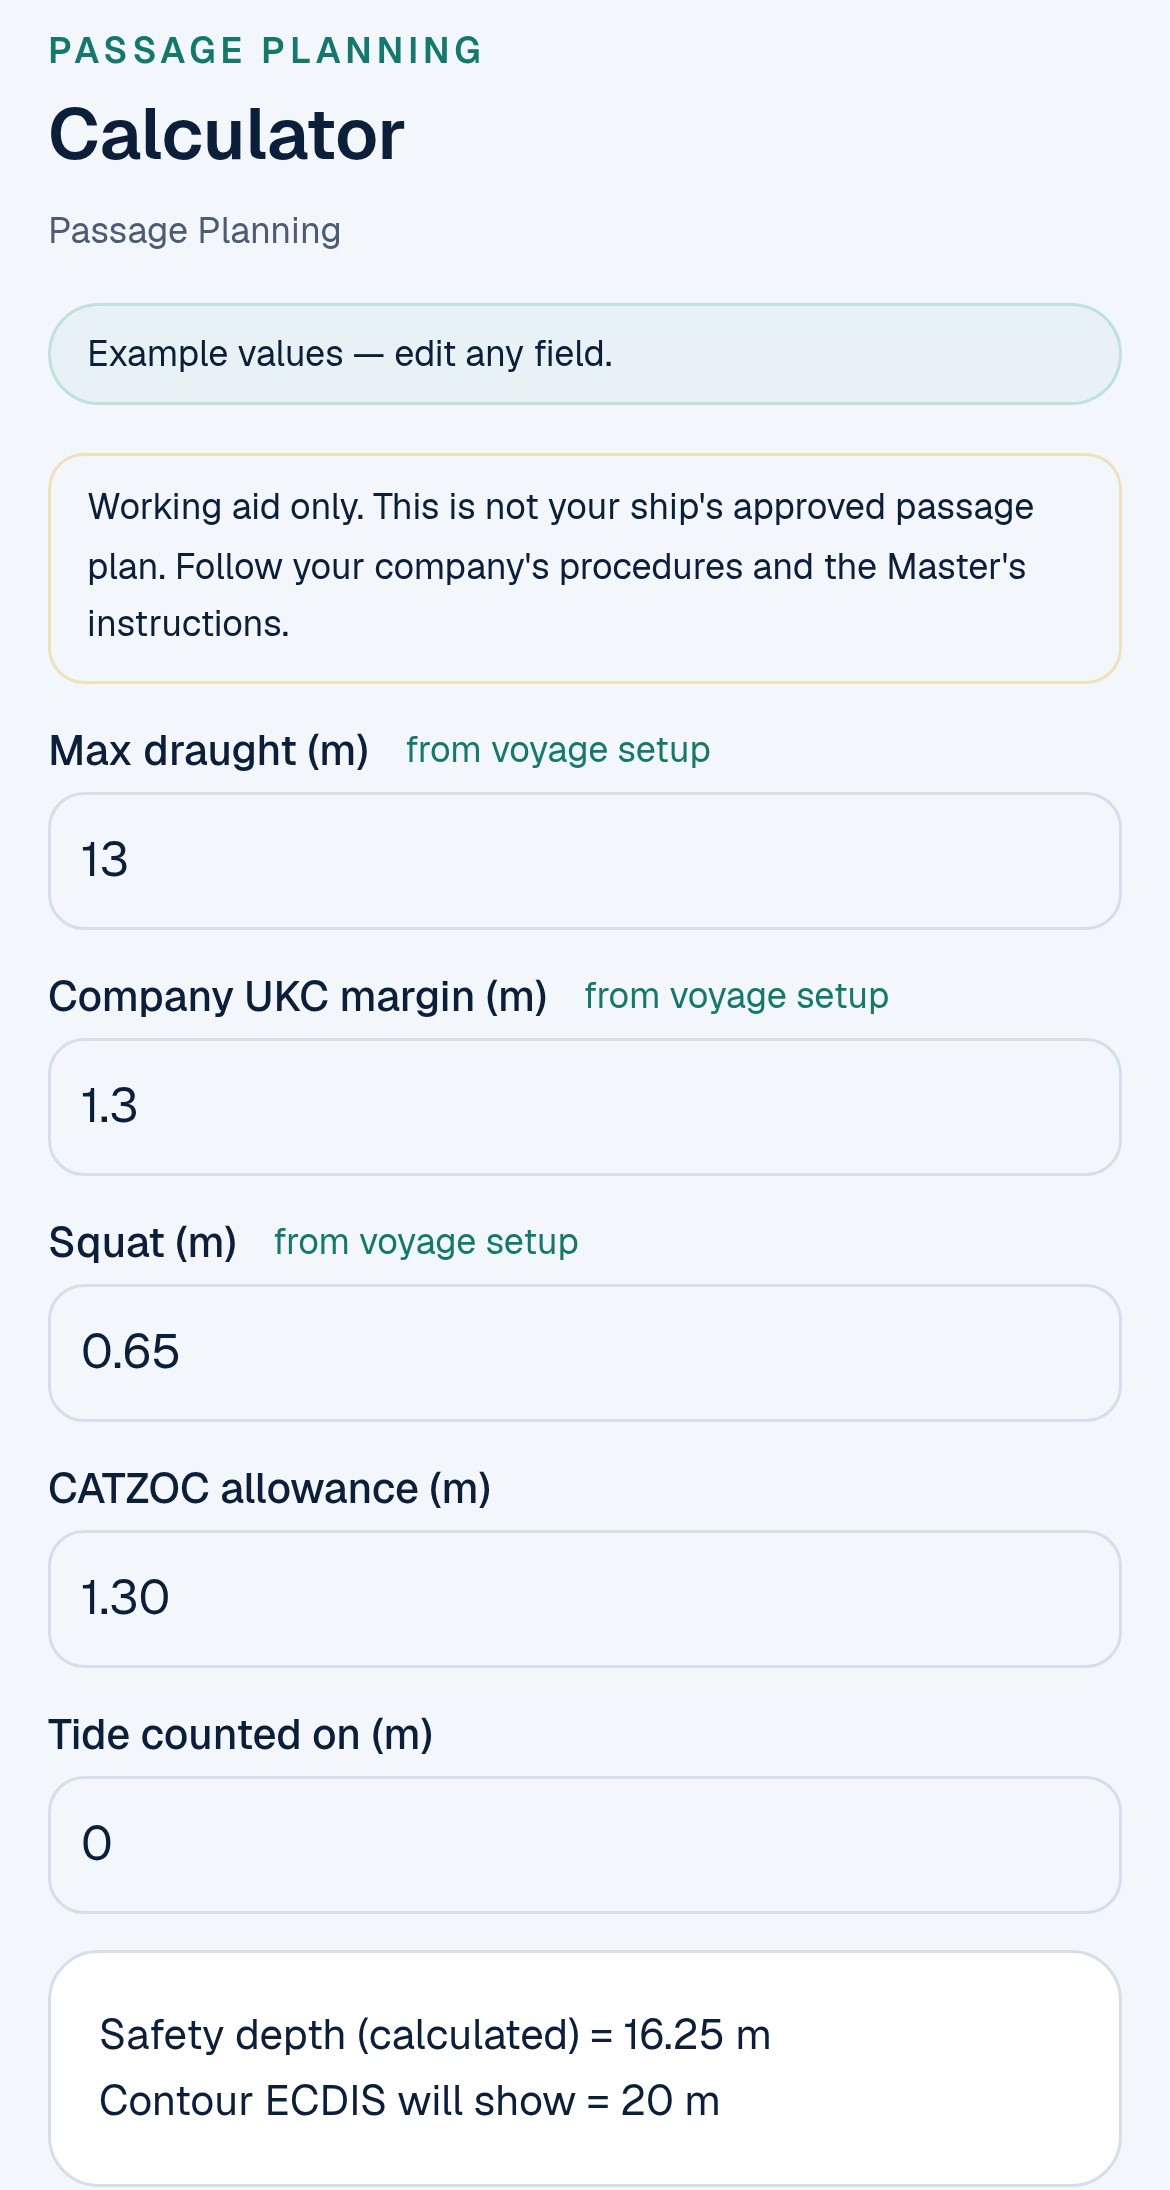
Safety depth 16.25 m, so ECDIS will show the 20 m contour (example values).
If the company UKC margin or the squat is missing, the tool doesn't guess. It asks you to enter them first. Still check every field before you trust the answer: these are estimates, so use your ship's own squat data where you have it, and your company's method if it differs.
The calculators
Open a calculator from the Open … buttons and Calculate links inside the steps, so it can fill in figures from your plan. The same six calculators are also in the Sea Calculator at maritimematch.ph/sea-tools/sea-calculator, for a quick figure without a plan. There are six:
- UKC and squat: the UKC worksheet with squat (open water or confined channel), CATZOC allowance, company minimum and the highest speed for that minimum.
- Safety contour: adds up the safety depth and shows the contour ECDIS will use.
- Wheel-over: the wheel-over distance and turn time for a planned alteration. For example, a 60° turn at 12 knots with a 0.5 NM turn radius gives 0.289 NM (2.9 cables) and about 2.6 minutes.
- Tidal window: when the tide gives you the height you need. Type the required height of tide, then the LW, HW and next LW times (hours from midnight, in decimals) and heights from the official tide table for your port and date. The tool shows when the window opens and closes. It starts with a built-in demo tide, and it won't let you save to the plan until you've changed those figures to your own.
- Air draft clearance: your clearance under a bridge or cable from the charted clearance, its datum, the tide and your air draft.
- ECA fuel changeover: a timing worksheet for changing to low-sulphur fuel before an emission control area. From the system volume, consumption, the sulphur content of the old and new fuel, the target at the boundary, the ETA at the boundary and a margin, it shows the flush time and when to start the changeover, both in hours from now and before the boundary. The Chief Engineer's procedure always governs.
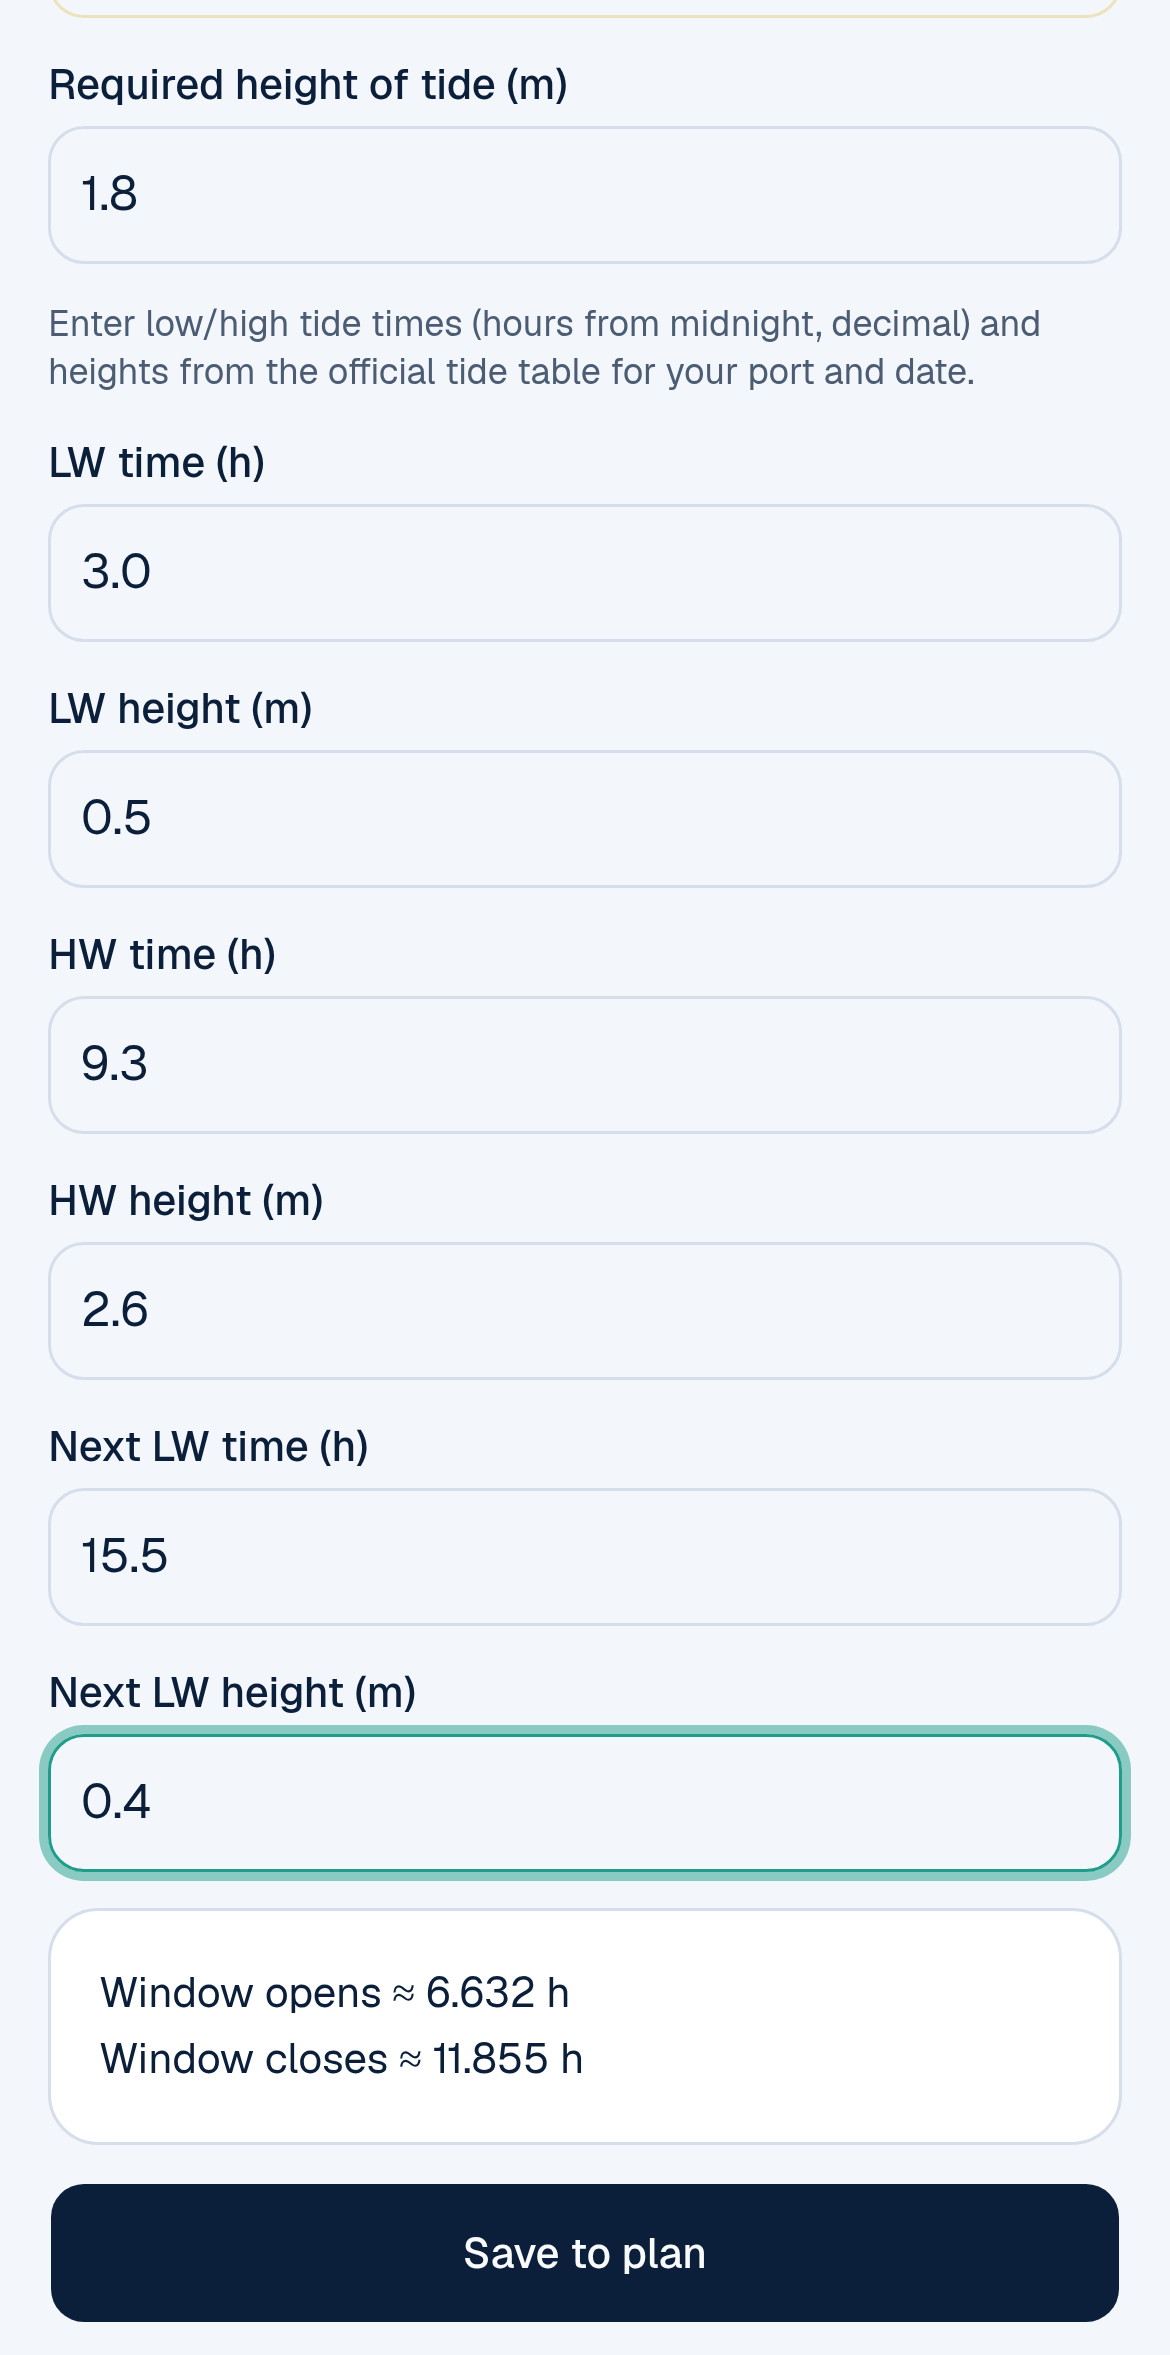
The tidal window with practice tide figures: the window is open from about 06:38 to 11:51 (example values, not from a real tide table).
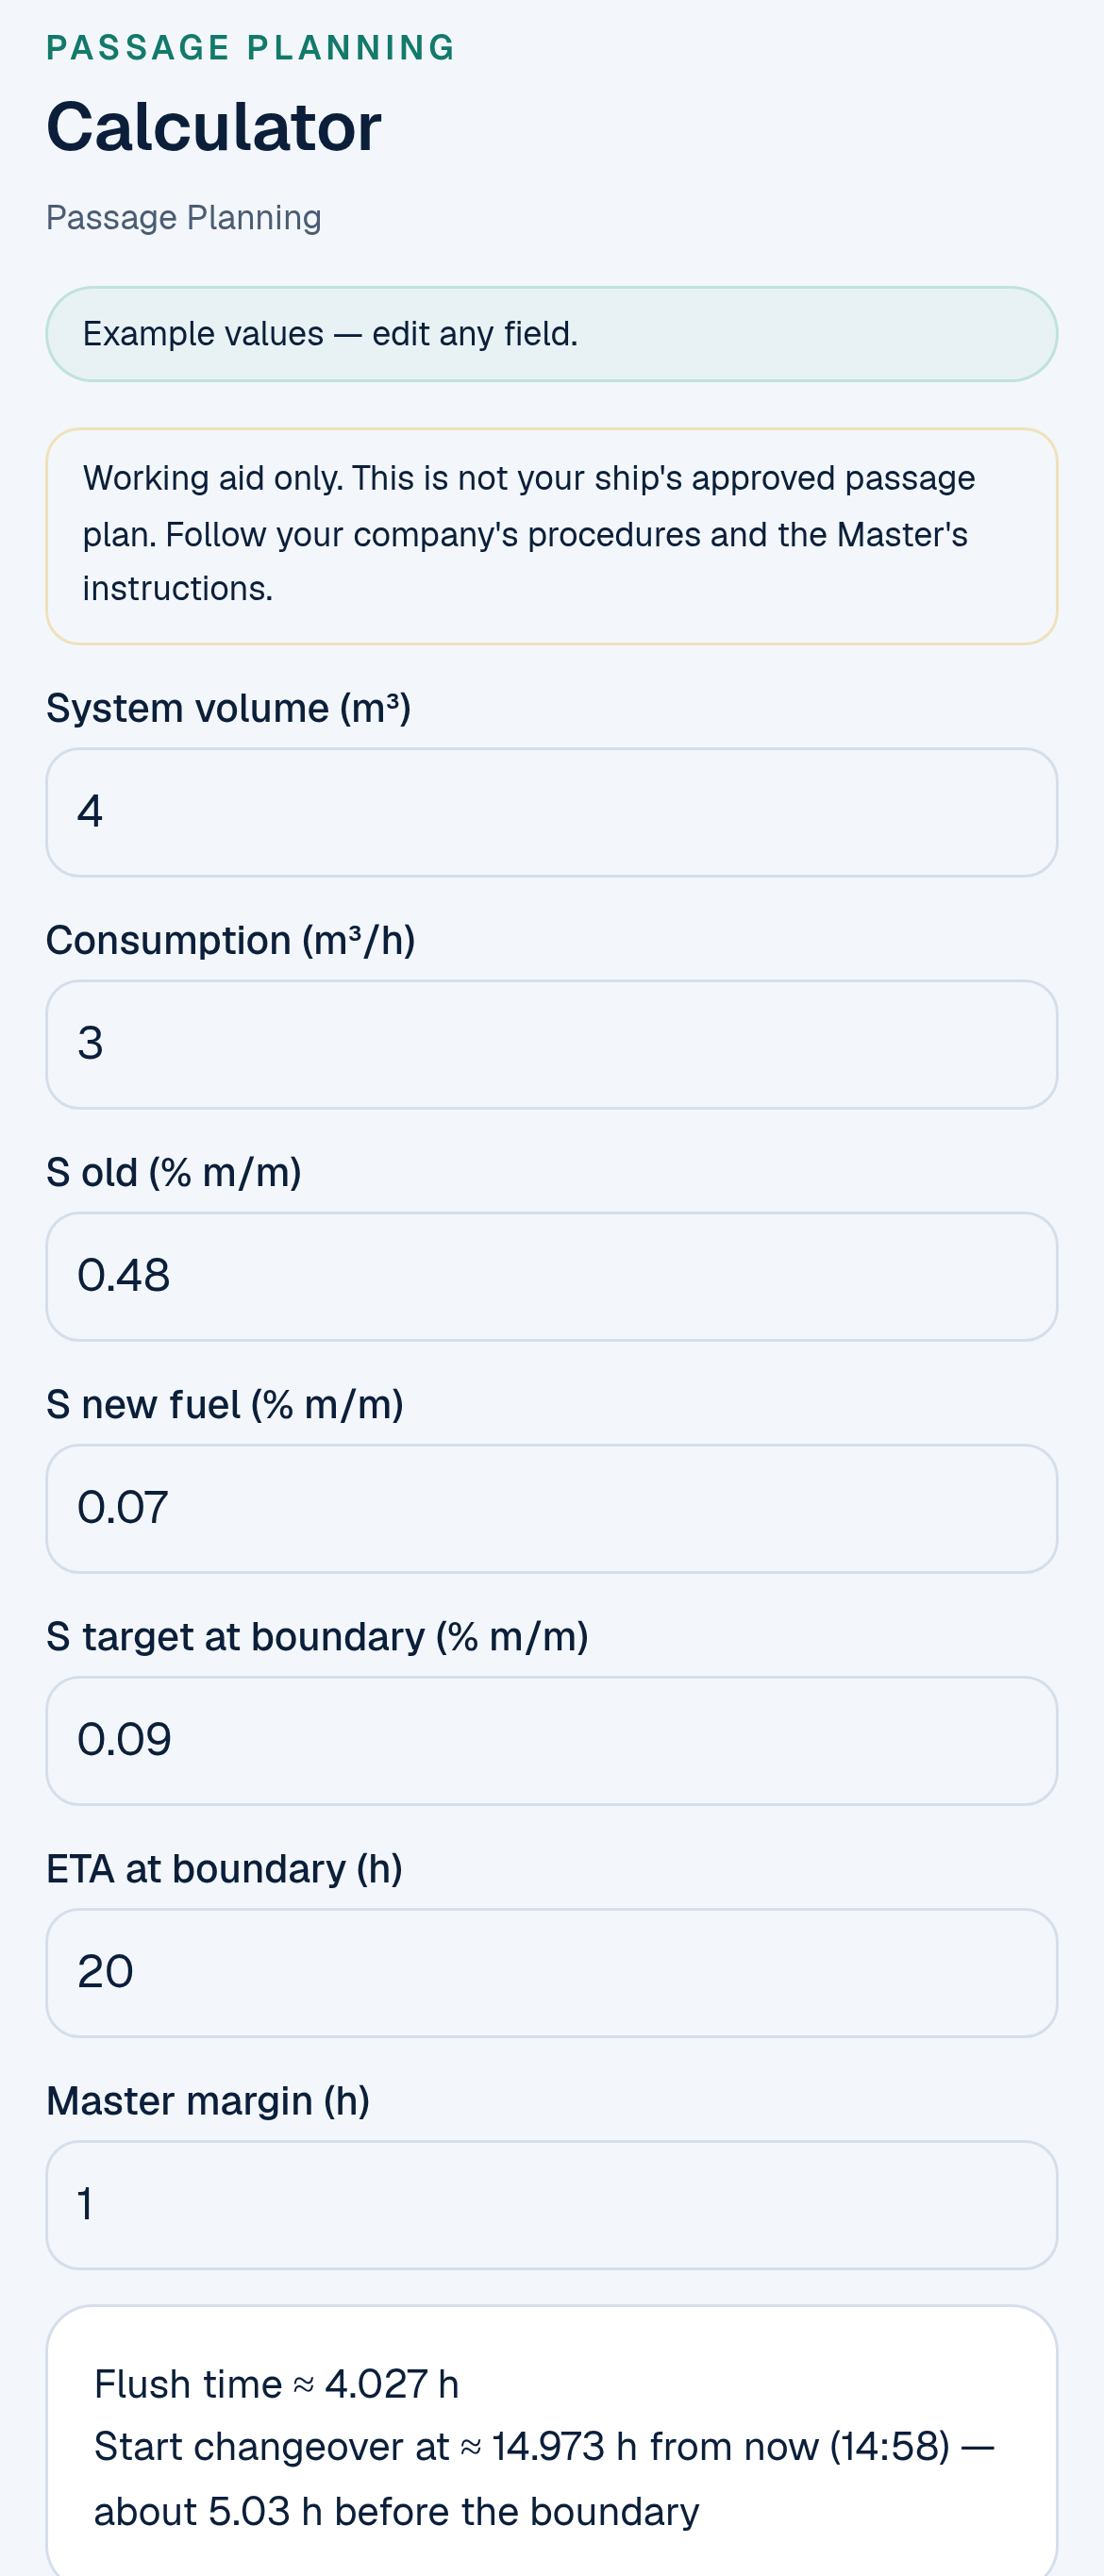
ECA changeover: with an ETA at the boundary 20 hours from now, start in about 14.97 hours, about 5 hours before the boundary (example values).
Inside a plan, tap Save to plan to keep a result with it. (In the Sea Calculator, without a plan open, the tool tells you nothing was saved.) Each calculator says it is an estimate, and you should check it against your ship's data, the official publications and your company procedures.
Where your plan is saved
Everything you enter (the voyage setup, ticks, notes, calculator results and the publication checklist) is saved in your phone's browser, on that device only. Close the page and come back, and it's still there. Nothing is sent to an account, so there's no sign-up.
That also means another phone, or another browser, won't see it, and clearing your browser data deletes it. In My plans, tap Export to save a copy as a file, and Import plan file to load it on another device.
What this tool is, and what it is not
The Passage Planning tool is a guided checklist and learning aid. Please keep these in mind:
- It is not the ship's approved passage plan. The plan is made on the ship's own form (or system), approved by the Master, and kept as your company requires. The tool's summary says so on every copy.
- It doesn't connect to ECDIS, radar or any bridge equipment. It guides you on what to set and check; you set and check it on board.
- It doesn't supply charts or publications. The publication checklist gives titles and volume numbers only, so always verify against the current catalogue and the corrected publication.
- The calculators are estimates. Use your ship's own data (pilot card, squat tables, manoeuvring booklet) where you have it.
- It is not approved by IMO, any flag State, class or port State control. A finished checklist doesn't mean an inspector will find nothing.
- If the tool and your company SMS or the Master disagree, follow your company and your Master.
The other free Sea Tools
At maritimematch.ph/sea-tools you'll also find:
- Sea Calculator: shipboard calculators, including ETA and distance, plus the passage calculators above.
- Bulk Calculator: trim, draft survey and load line.
- Grain Stability Check: a worksheet-style check against the IMO Grain Code Part A §7 criteria, using your booklet data.
- ORB Entry Helper: drafts and self-checks Oil Record Book Part I lines.
- MedDeck: a practical medical reference for seafarers.
- Cook Hub: menu planning for the galley.
All are free for seafarers.
Frequently asked questions
Is the Passage Planning tool free? Yes. It's free, with no sign-up and no payment.
Do I need an account? No. Everything works without logging in, and your plan stays on your own device.
Can I use it as my ship's passage plan? No. It's a working aid that helps you build and check the plan. The approved plan is on the ship's own form, approved by the Master before departure.
What does APEM stand for? Appraisal, Planning, Execution and Monitoring: the four stages of voyage planning in IMO Resolution A.893(21). The tool is organised in exactly those four stages.
Does it set up my ECDIS? No. There's no ECDIS screen in the tool and it doesn't connect to the ship's equipment. Step P7 guides you through what to set and check on the ship's ECDIS: safety depth and contour, shallow and deep contours, XTD per leg, look-ahead, alarms and indications, the route check and the backup.
Why does ECDIS show a deeper contour than the safety depth I calculated? Because the ENC only holds certain contours. If your value isn't one of them, ECDIS uses the next deeper contour. In the example, a safety depth of 16.25 m means ECDIS shows the 20 m contour.
Which squat formula does it use? The Barrass estimate: squat ≈ K × Cb × V² ÷ 100, with K = 1 in open water and a larger K in a confined channel, worked out from the channel width and depth. It's an estimate, so use your ship's own squat data where you have it.
Can I work out a tidal window with my own tide table? Yes. Type the low and high water times and heights for your port and date into the tidal window calculator. It won't save a window to your plan while it still shows its built-in demo tide.
Does it list the publications I need? It lists the titles and volume numbers to hold or check for the areas you pick, with official links. Always verify against the current catalogue and corrected publications.
I don't use paper charts. Can I hide the paper chart step? Yes. Turn off Paper charts used in voyage setup, but only if the ship carries no paper charts at all.
What happens if I mark a critical item N/A? The tool asks for a short reason in the note. A critical item can't be marked N/A without one.
Is this useful for cadets? Yes. Read the Why? behind every item and the Key terms, and work through a practice plan for a route you know. That's the fastest way to understand what the 2nd Officer is doing on the chart table and the ECDIS.
Does it work on my phone? Yes. It's built for a phone screen and runs in your normal browser.
Is Maritime Match a manning agency? No. Maritime Match is a portal only, and seafarers never pay fees.
Try it on your next passage plan
Open maritimematch.ph/sea-tools/passage-planning. Start a practice plan for a route you know, read the Why? behind each critical item, and work out the UKC and safety contour for your own ship. The next time you sit down at the chart table, you'll know the reason behind every step, not just the routine.
Disclaimer: this tool and this guide are guidance only. Follow SOLAS Chapter V, Regulation 34, IMO Resolution A.893(21), your flag State's requirements, your company SMS and the Master's instructions. Maritime Match is not affiliated with or endorsed by IMO.